Showing posts with label card. Show all posts

Wednesday, August 14, 2013

Scor-Pal and Viva Las VegaStamps! Week with Toni Storie

 We have a fun week of inspiration to share with you today from Scor-Pal and Viva Las VegaStamps! Be sure to leave comments on our blogs this week to be in the running for great prizes.  VLVS will be giving away a couple of pounds of rubber stamps, and we will be giving away a Scor-Pal and a Scor-Envi.  The more comments you leave, the more chances you have to win! 

Hi, Toni here! It's my turn to share a Scor-Pal and Viva Las VegaStamps project. We will have a week long showing of some crafty goodness by both the Scor-Pal design team and the Viva Las Vegas creative team. I received some really fabulous stamp set with so many great images and sentiments.  I chose to show off this great image with a recessed window card.
For this project, you will need:
  • Ruler
  • Craft Knife
  • Stamps
  • Inks
  • Embellishments
  • 4 1/4" x 8 3/4" piece of card stock
  • Two 4" x 4" pieces of card stock
  • Two 3 1/4" x 3 1/4" pieces of card stock
  • Two 3" x 3" pieces of card stock
  • 2 7/8" x 2 7/8" piece of card stock
Place the 4 1/4" by 8 3/4" piece of card stock in your Scor-Pal.  The 8 3/4" piece will be against the top fence of the Scor-Pal.  Score at 4 1/4" and 4 1/2" marks.
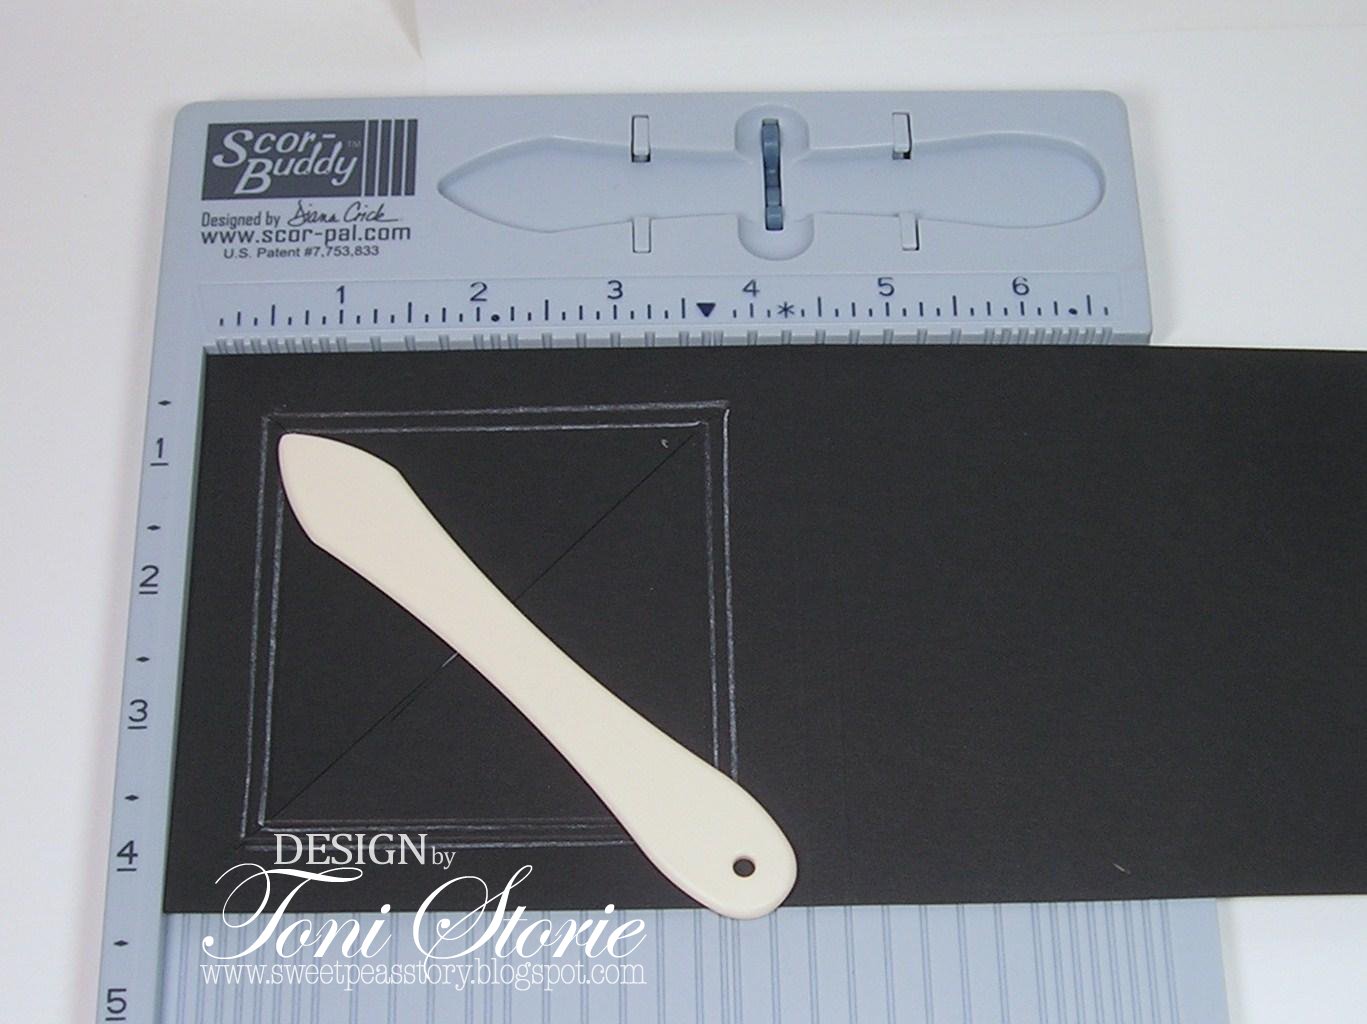
Place a 3 1/4" by 3 1/4" piece of card stock where you want your recessed window.  Trace around the piece of card stock and remove it.
Place a 3" by 3" piece of card stock inside of the previously traced square.  Trace around the piece of card stock and remove it.
Insert your Scor-Mat in your Scor-Pal and place your card stock on top of it.  With a ruler and a craft knife make a cut from one corner to the opposite corner.  Repeat with the remaining two corners. 
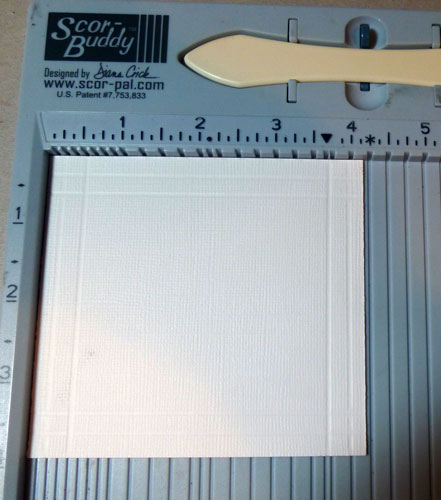
Score on the traced lines on each of the four sides.  The traced lines are 1/8" apart, so the scoring was completed with a Scor-Buddy
Turn your card stock over and crease the outside scores away from the center of the square. 
Next, crease the inside scores toward the center of the square.  This creates a negative "X" shape and is the base of the recessed window.
Crease the scores made in the very first step to create the spine of the card.  The two scores make room for the recessed window and allow the card to lie flat.
With card open and recessed window on top, line the inside of the window with Scor-Tape
Remove backing from Scor-Tape and place a 3 1/4" by 3 1/4" piece of card stock into the recessed opening.
Stamp the Viva La Vegas Marilyn Monroe image in black and red on a 2 7/8" by 2 1/8" piece of card stock.  Overstamp the whole image with Versamark ink and emboss with clear embossing powder to create a sheen.  Mat the Marilyn image on a piece of 3" by 3" piece of card stock.  Adhere focal image into the recessed window.
Finish inside of card by covering the back of the recessed window with a 4" by 4" piece of card stock.  Cover the inside of the card with another 4" by 4" piece of card stock and stamp a Marilyn Monroe quote from the same Viva Las Vegas Stamps set. 
Finish the outside of the card with a rhinestone frame.
Here is a view from the side to better show the recessed window in which Marilyn is framed.
Thanks for joining me today!

Details - Stamps: Plate 1185 (Viva Las Vegas Stamps); Paper: Black Licorice, Real Red, Neenah Solar Crest White; Ink: Tuxedo Black, Real Red, Versamark; Accessories: Scor-Pal, Scor-Buddy, Scor-Mat, Scor-Tape, ruler, craft knife, self-adhesive rhinestones, clear embossing powder, heat tool.

Tuesday, August 13, 2013

Scor-Pal and Viva Las VegaStamps! Week with Diane Zechman

  We have a fun week of inspiration to share with you today from Scor-Pal and Viva Las VegaStamps! Be sure to leave comments on our blogs this week to be in the running for great prizes.  VLVS will be giving away a couple of pounds of rubber stamps, and we will be giving away a Scor-Pal and a Scor-Envi.  The more comments you leave, the more chances you have to win!

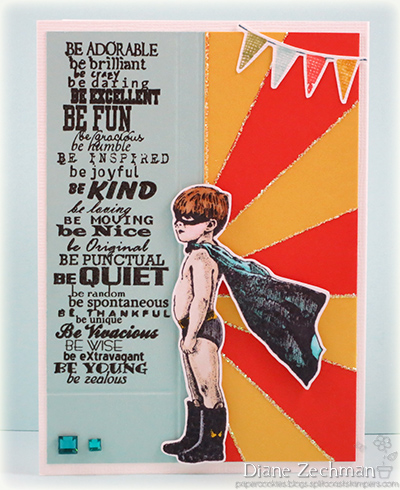
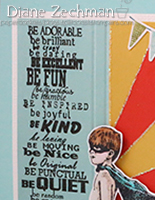
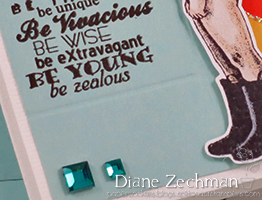
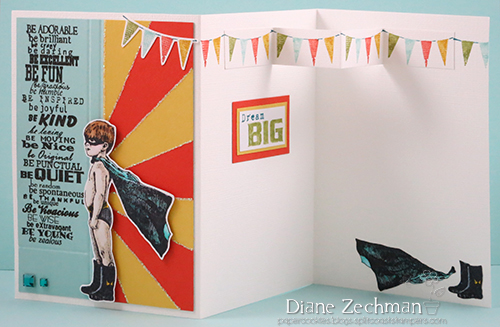
Hello! This week the Scor-Pal DT is teaming up with Viva Las Vegastamps and today I am sharing my project. I had a hard time choosing which plate to work with...they have some funny ones! But I settled on this one with an adorable image of a super hero wanna-be. How cute is he? The words and banner are also on this plate of rubber. They all worked so well together with my Scor-Pal to create a tri-fold card. To make the tri-fold card: start with a 5 1/2 x 12 inch card base and score it at 4" and 8". To make the rays on the front panel: Cut a piece of copy paper to 1 7/8" x 5 1/4". Score and fold this at 3 1/4". Then cut 4 strips of cardstock (1 1/2 x 4 inches each) diagonally from corner to corner. Apply adhesive to the copy paper and adhere the cardstock triangles, aligning the first one with your scored mark. Trim excess. I added some Stickles to the lines. The "rays" were adhered to a light blue panel measuring 3 3/4" x 5 1/4". Then I stamped the words and scored some lines vertically and horizontally on the blue cardstock as shown below.
The little super-hero was popped up on dimensionals.
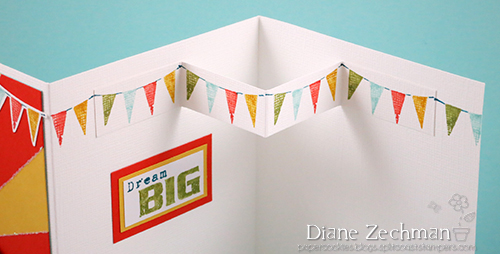
Another cape and boots were added to the inside, along with an additional sentiment from the same plate and a pop out banner. To create the banner: start with a 3/4" x 6 1/2" cardstock strip. Score it at 1 5/8", 3 1/4", and 4 7/8". (I created this banner to fit the measurements of the banner stamp that I used. Adjust the measurements to fit your needs.) Stamp the image onto each of the 4 sections and valley/mountain/valley fold. Attach the first and last sections to the top of the inside of the card as shown. Stamp additional banner images to complete the card. stamps- Viva Las Vegastamps Plate 918; paper- textured white, SU! Pool Party, Daffodil Delight, and Tangerine; ink- Memento Tuxedo Black, SU! Crushed Curry, Tangerine, Pool Party, Lucky Limeade, Island Indigo; accessories- Scor-Pal, Scor-Tape, Copics, Stickles, foam tape, gemstones.  

Monday, August 12, 2013

Scor-Pal and Viva Las Vegastamps! Week with Steph Ackerman

 We have a fun week of inspiration to share with you today from Scor-Pal and Viva Las VegaStamps! Be sure to leave comments on our blogs this week to be in the running for great prizes.  VLVS will be giving away a couple of pounds of rubber stamps, and we will be giving away a Scor-Pal and a Scor-Envi.  The more comments you leave, the more chances you have to win!

Hi everyone, Steph  here today.  Viva Las VegaStamps  and Scor-Pal are teaming up this month and I'm excited to show you what I've created.   With so many fun stamps at Viva Las Vegas Stamps, you will find so much to choose from.   And don't forget to check out all the fun creations by both teams this week.

I received this fun plate of stamps with an assortment of images.  I began creating and just couldn't stop!!!!!


SANTA Card


Create a 5 1/2" square card from black cardstock by cutting cardstock 5 1/2" x 11"
Score at 5 1/2" and fold to create the card
Cut white cardstock 4 1/4" x 4 1/4"
Score 1/4" and 1/2" on all 4 sides


Stamp image and sentiment in center of the white panel
Add red ink around the panel
The addition of the red ink around the panel allows the focus to be on the image and sentiment


Mat the image with black cardstock and adhere to snowflake paper
Mat the snowflake paper with black cardstock and adhere to striped paper
Adhere the striped paper to the card


The image and sentiment were one stamp, but you could easily cut them apart and ink them separately.


HOLY FAMILY Card


Create a 5 1/2" square card from white cardstock by cutting cardstock 5 1/2" x 11"
Score at 1/4", 1/2" and 3/4" around the card
Using brown ink, add color around the card


The diamond pattern was created using my Cricut machine
Center it on the card
Stamp image and color lightly with Zig Markers
Using a Spellbinders die, die cut closely around the image
Create a larger brown mat for the image


Adhere the image to the card front


AWESOME Card

Create a 5 1/2" x 5 1/2" top fold card by scoring a sheet of 5 1/2" x 11" cardstock
Stamp image twice on cream cardstock
Cut to size and lightly ink the edges
Mat each with brown cardstock
Place the  images on the card and  score across the bottom at 1/2", 1" and 1 1/2"


Stamp the sentiment on cream cardstock and lightly ink
Mat with brown cardstock and adhere across the scored lines with foam adhesives for dimension


Thanks for stopping by today.

Steph


Monday, June 24, 2013

Scor-Pal and Heartfelt Creations with Steph Ackerman

Good morning, Steph here and I had the privilege of working with some stamps and dies from Heartfelt Creations.

The die I received is Layered Elegant Swirl (HCD 716), and the stamps I used are Flirty Fleurs (HCPC 3439) and Classic Messages (HCPC 3354).

Using my Scor-Pal, this belly band card was not only fun to create, it was also easy.  This card is the result of playing around with the Layered Elegant Swirl dies!


Cut green cardstock 9 1/2" x 9 1/2".
Score at 2 1/2" and 7".


Center the die along at the top of the center panel and tape in place.
Run through a die cut machine and remove the excess cardstock.
This die was just used to start the initial shape of the card.
Place wax paper across the card and tape the detailed die to the center panel, matching up the scalloped edges from the previous die cut.
Run through a die cut machine.


Repeat these steps around for all 4 sections.


Score along the edges of the die cuts.
Fold inward.
Cut a panel of pattern paper 4 1/4" x 4 1/4" and adhere within the scored lines to complete the interior of the card.


Lightly stamp the Floral image in the right corner with brown ink and emboss with clear embossing powder.
Stamp and cut out 3 tiny flowers and mold into shape.
Adhere atop the stamped image.
Add Dew Drops from the Robin's Nest to the center of each flower.
Stamp sentiment in black ink, mat with matching cardstock and adhere to the upper left edge of the card.


To create the belly band, cut coordinating cardstock 2 1/2" x 12".
Score at 3", 3 1/8", 8", and 8 1/8".
Fold on the scored lines.
Stamp the Floral image randomly across this band and emboss with clear embossing powder.
Stamp and cut out 2 tiny flowers and mold into shape.
Adhere atop the stamped image on the center portion of the belly band.
Add Dew Drops from the Robin's Nest to the center of each flower.


Add Scor-tape to the reverse side and adhere the ends together to create the belly band.


 Another view of the card with the belly band separate.


Thanks for stopping by today.

Steph

Thursday, May 2, 2013

SEI and Scor-Pal Week with Tya Smith


Welcome back for the 4th day of SEI and Scor-Pal cross-promotion week !  We have lots of fun in store for you, including wonderful projects and great prizes.  Every day, we will have 2-3 posts on our blog, and the SEI blog is going to be sharing projects and prizes as well. Leave comments on our blog, and Facebook page for entries to win.  There may be extra ways to earn entries hidden in the posts - so pay close attention for those chances.

So, speaking of prizes, here they are:

1.  A full-sized Scor-Pal!  We will also add a couple of rolls of Scor-tape!

2. May papercrafting kit 


 3. May card kit.
 

  So you have three chances to win! Be sure to tell your friends, because you won't want to miss out on this giveaway!  Make sure all of your entries are in by Sunday, May 5th, 11:59 pm E.S.T.
Hello all - Tya here with a quick and easy little gift card holder that would be perfect for that special lady in your life (grandmas, mom's, aunts, friends etc.)


TRI-FOLD GIFT CARD HOLDER
Supplies used:
SEI Diane paper
SEI Think of Me stickers
5 1/2 x 10 1/2  orange cardstock
(3) 3 1/4 x 3 1/4 pattern paper (1 floral, 1 purple, 1 blue)
1x 10 1/2 pattern paper for belly band
Pearls 
 6x6 inch piece of paper for the envelope

Step 1-
On  10 1/2 inch side of the orange cardstock, score the paper at 3 1/2 and 7.


 Step 2-
 On 5 1/2 inch side of orange cardstock, score the paper at 3 1/2


 Step 3-
Lay the paper on its 10 1/2 inch side. Cut the outer bottom sections off the paper as shown.


 Step 4-
Line the outer panels up on the 6 inch mark of the Scor-pal and do a diagonal score as shown.

 Do this on both panels. MAKE SURE THAT YOU DO YOUR SCORE MARKS IN THE SAME DIRECTION ON BOTH PANELS.(See below). Otherwise your card will not fold up properly.
 Step 5-
Fold on all the scored marks as shown:
  Step 6-
You have (3) 3 1/4 x 3 1/4  pieces of pattern paper. You are going to take 2 of these squares and diagonal score them so that you have 2 halves of the same papers. You will use these to decorate the diagonal scored outer panels of the card.

Add the other whole piece of 3 1/4 x 3 1/4 pattern paper square to the middle section of the card. Add some score tape to the outer edges of the middle panel to make the pocket. Add the stickers and the tag.

 Step7-
To make the belly band, take the 1 x 10 1/2 inch paper and score it at 3 1/2 and 7.

 Step 8-
Add the belly band around the card. Place the sentiment sticker on some cardstock and trim. Add the sentiment to the belly band. Embellish the sentiment.


Step 9-
If you'd like to make an envelope for this card with your Scor-Envi tool, take a 6 x 6 piece of paper, lay diagonally on the Scor-pal and you will score at 4 and at 8 to make the envelope. It is a 4 inch sizes enevelope.
Find me on Facebook/Pinterest/My Blog/Heartland Paper