Today I'm sharing the tutorial for the wreath I made for More Than One Score with Scor-Pal challenge
Products needed:
Wire Wreath form - Mine was from the Dollar Tree
Wired ribbon of choice
Paper Pad - I used Farmstead Harvest by DCWV
Any other embellishments you would like - I used dried Wheat, silk leaves, a cotton stem, pinecone, vintage buttons for "flower" centers.
Sign - Target Bullseyes Playground
Border Punch for edges of flowers
Scor-Pal Eighths board
Scor-Tape
Hot Glue gun and glue sticks
Paper Trimmer
Amazon Affilate links may earn me a small commission but do not increase the price for you, they simply allow me to continue to bring crafts to you
You start by wrapping the ribbon around the wire wreath form, hook one end under a row at the back and hot glue the pieces together to stop them slipping off. Then wrap the ribbon around the wreath form, overlapping slightly on each "wrap" to form a base for your decorations.
It will look like this when complete.
Using your border punch, punch allong the edge of a 12" piece of patterned paper.
Using your paper trimmer cut paper to be 1 1/2" wide and 12" in length.
Line the paper up at the top of the Scor-Pal and score the whole length at 1/2" increments.
Pleat your paper in a "hill and valley" style along the length of the paper.
Attach Scor-Tape to the end to adhere both ends together.
Form into a ring and attach, it will look like this.
Gently press the piece into a circle to form the flower.
Add hot glue to secure the flower together, I like to add a circle of cardstock for extra support.
You make these flowers in different sizes, the wider the paper the larger the flower, for flowers where the strip is more than 2" wide you will need to use additional strips or the paper will tear when you try and flatten it to make the flower. Add any embellishments you like to the center, I chose some vintage buttons
Adhere the paper flowers to the wreath with hot glun, for the floral stems I simply pushed those into the where the ribbon overlapped but you can hot glue them too. Add the sign with hot glue too.
I hope you enjoyed this little different from usual project, I like to combine crafts and so using paper crafts in home decor is a nice change from making a card.
Kaite
Showing posts with label Mid Challenge tutorial. Show all posts
Thursday, October 15, 2020
Saturday, August 15, 2020
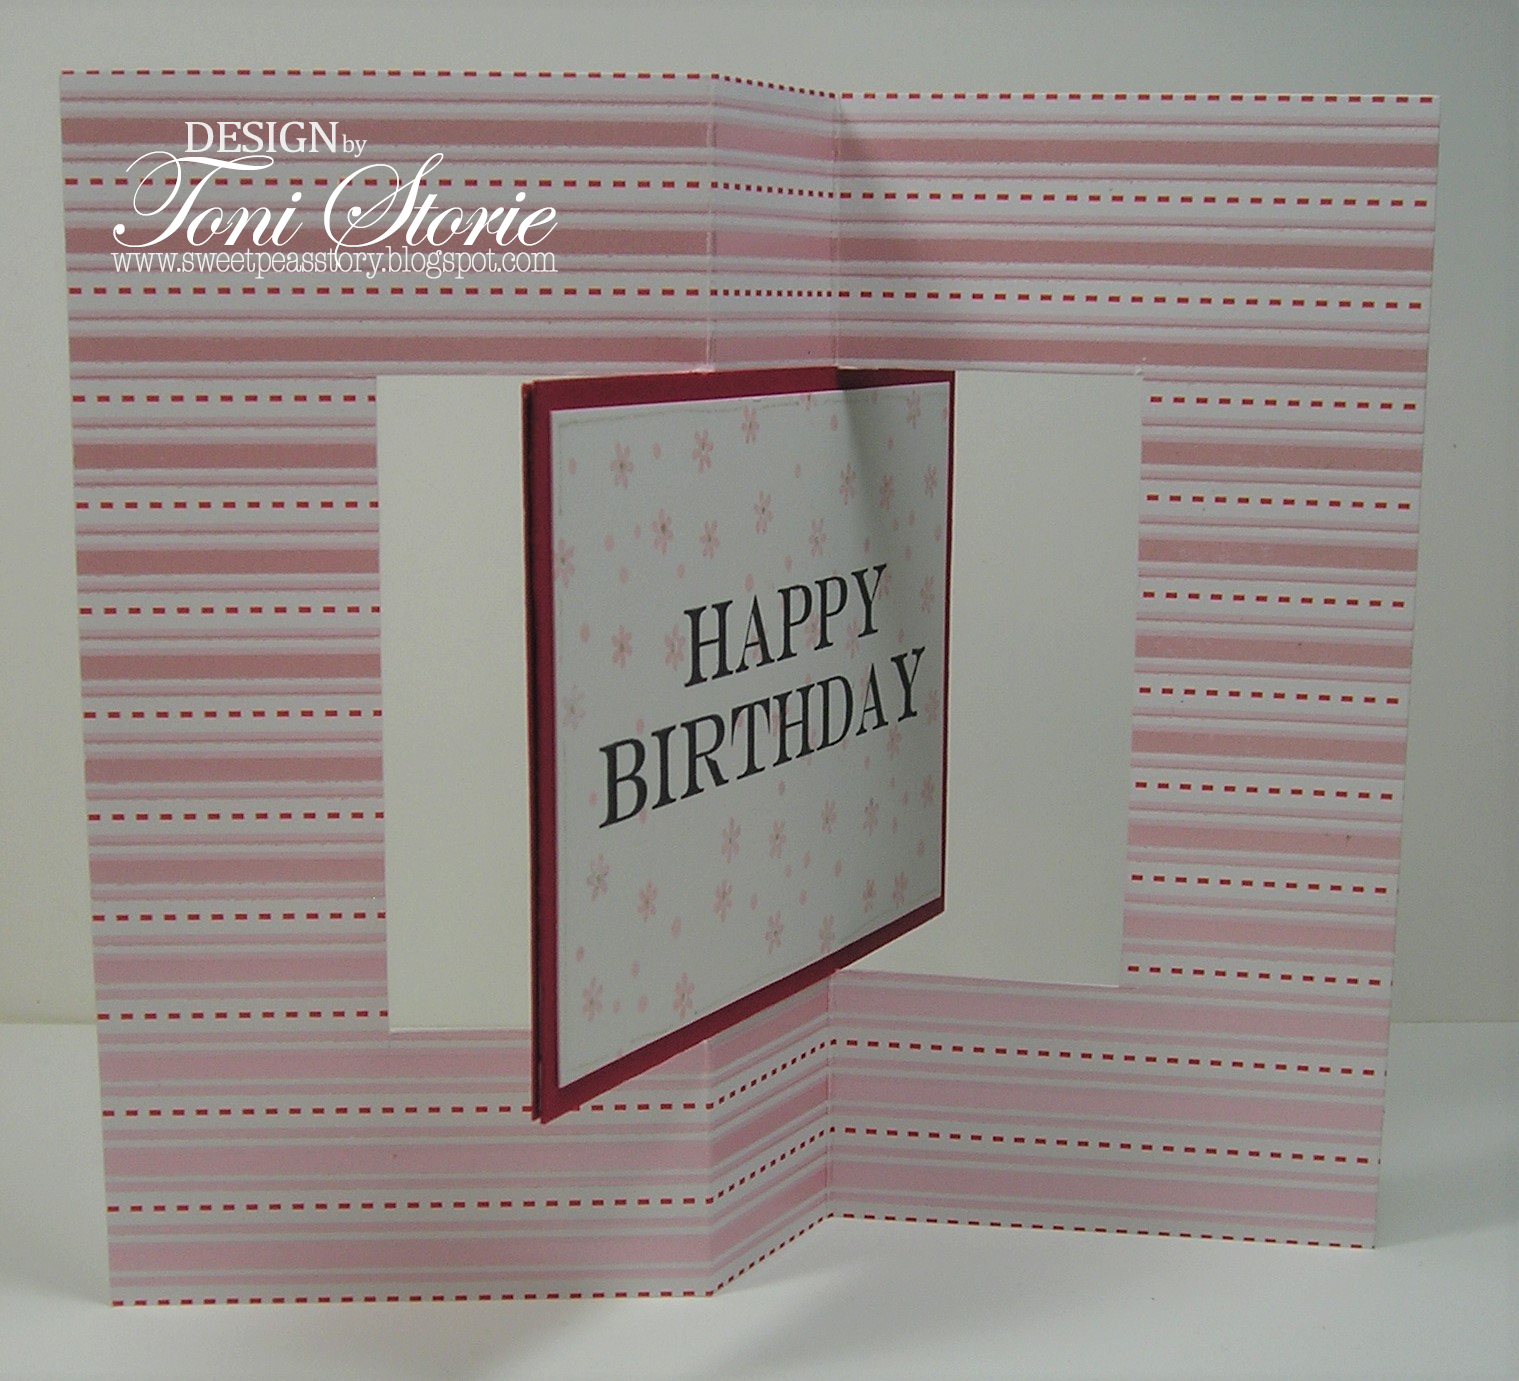
Mid Month Tutorial - Swing Card by Toni
We are at mid-month! And, I have the mid-month tutorial on my Birthday Swing Card for you. Since this month's theme is Birthday, I wanted to make a fun and interactive card. A swing fold card fits the bill for both idea. The rest of the team has made some amazing projects so be sure to check out the Scor-Pal blog for pictures and links to their blogs.
For this project, you will need:
Rotate the patterned paper 180 degrees. Once again, align the ruler with the 5 1/2" mark and cut a vertical line from 1 1/4" to 4 1/4".
Rotate patterned paper 90 degrees. Align the ruler with the 4 1/4" mark and make two vertical cuts. Cut down from 1 1/4" to 2 3/4" and then cut down from 4" to 5 1/2". Rotate patterned paper 180 degrees and repeat the previous alignment and the previous two cuts.
Remove the Scor-Mat from the Scor-Pal. Align the 6 3/4" side of the patterned paper against the top fence. Make two vertical scores on the 2 3/4" mark from the top of the paper to 1 1/4" and then from 4 1/4" to the bottom of the page.
Flip the paper over so that the pattern is down. Make two vertical scores on the 4" mark from the top of the paper to 1 1/4" and then from 4 1/4" to the bottom of the page.
Burnish all of the scores as shown.
Stamp desired image and sentiment on each of the 2 3/4" x 4" pieces of card stock. Mat those on the 3" x 4 1/4" pieces of card stock.
Adhere matted pieces on the center swinging piece of the card base.
I hope you give this tutorial a try or pick another project for this month's More Than One Score challenge. If you are low on ideas or are looking for inspiration, be sure to check out the Projects on the Scor-Pal website or our Pinterest board.
Details - Stamps: Watercolor Garden (SU), Fresh Fillers (SU), Background Diamonds and Flowers (MFP); Paper: Real Red, Recollections White, SEI Think Of Me dp; Ink: Tuxedo Black, Pink Pirouette, Daffodil Delight, Pear Pizzazz; Accessories: Scor-Pal, Scor-Mat, ruler, craft knife, Scor-tape, Sakura Clear Star gel pen.
Mid Month Tutorial by Steph
Hi everyone, it's a new month and the challenge on the Scor-Pal blog is to create anything, just be sure it includes more than one score.
I chose to create some new gift card holders. My inspiration came from this gift card holder I saw on Pinterest.
I honestly don't like giving a gift card because I feel I haven't actually bought that person something. But I have found that if I dress up the gift card, I actually feel better about giving the gift card.
These are really simply and easy to create, and if you use a sturdy double sided cardstock, it's already decorated!
Start by cutting cardstock 5" x 9 3/4".
With the long side at the top edge of the Scor-Pal, score at 1 3/4", 4 1/2", 5 3/4" and 7".
Fold on the first and last scored lines, then create the mountain fold with the middle scored lines. Use your Scor-tool to burnish the fold lines.
Turn the piece over and add Scor-Tape along the middle section, being sure to add Scor-Tape to what will be the bottom of the holder. The Stacker is perfect for this as it holds your tape while you have both hands free to place the tape.
Since you can create 2 gift card holders from 1 sheet of 12" x 12" cardstock, I created a second one using the reverse side of the paper.
Die cut Happy Birthday from white cardstock, adhere to die cut circles, and place on the bottom flap. Place gift cards in the holder.
Wrap the gift card holders with ribbon.
Finish by stamping a birthday phrase from Joy Clair's Out of this World stamp set on an oval, then tie it to the ribbon.
Please stop by the blog to see what the designers have created for you this month.
Thanks for stopping by.
Steph
Wednesday, July 15, 2020
Mid Month Tutorial by Lois
As hostess for the July Scor-Pal "More Than One Score" challenge, I have the instructions for my Patriotic wiper card.
Two pieces of cardstock cut 4 1/4" x 8 1/2"
One piece of cardstock cut 1 1/2" x 3"
Scor-Pal
Scor-Tape
Score one piece of the 4 1/4" x 8 1/2" cardstock at 1 1/2" and 3".
Score the other piece the same.
Fold both strips as shown.
Place the 1 1/2" x 3" piece of cardstock as shown, with the right-hand corner at the 1" mark. Score at the 1" mark.
Place two small pieces of Scor-Tape at the score line.
Place the small strip in the left-hand small section so that the diagonal score line is just below the top of the card.
Place Scor-Tape on the small outside section of both strips, as shown.
Adhere the two panels as shown, with the small "wiper" strip at the top left.
When the card is closed, the "wiper" will fold down between the two sections.
Now it's time to decorate the card.
White cardstock cut to 4" x 5 1/4"
Blue cardstock cut to 3 7/8" x 5 1/8"
Two small white strips cut to 1 1/4" x 4"
Two small blue strips cut to 1 1/8" x 3 7/8"
Two pieces of patterned paper cut to 1" x 3 3/4"
White cardstock cut at least to 4 1/4" x 5 1/2" (larger than will be required to allow trimming)
Create sunset background on the white cardstock using Distress Oxide inks -- Seedless Preserves, Abandoned Coral, Worn Lipstick, and Frayed Burlap.
Stamp images and trim to 3 3/4" x 5" Layer the two small panels and adhere to the two left-side small sections. And the card is complete.
I cut out and attached a small American flag to the wiper.
Two pieces of cardstock cut 4 1/4" x 8 1/2"
One piece of cardstock cut 1 1/2" x 3"
Scor-Pal
Scor-Tape
Score one piece of the 4 1/4" x 8 1/2" cardstock at 1 1/2" and 3".
Score the other piece the same.
Fold both strips as shown.
Place the 1 1/2" x 3" piece of cardstock as shown, with the right-hand corner at the 1" mark. Score at the 1" mark.
Place two small pieces of Scor-Tape at the score line.
Place the small strip in the left-hand small section so that the diagonal score line is just below the top of the card.
Place Scor-Tape on the small outside section of both strips, as shown.
Adhere the two panels as shown, with the small "wiper" strip at the top left.
When the card is closed, the "wiper" will fold down between the two sections.
Now it's time to decorate the card.
White cardstock cut to 4" x 5 1/4"
Blue cardstock cut to 3 7/8" x 5 1/8"
Two small white strips cut to 1 1/4" x 4"
Two small blue strips cut to 1 1/8" x 3 7/8"
Two pieces of patterned paper cut to 1" x 3 3/4"
White cardstock cut at least to 4 1/4" x 5 1/2" (larger than will be required to allow trimming)
Create sunset background on the white cardstock using Distress Oxide inks -- Seedless Preserves, Abandoned Coral, Worn Lipstick, and Frayed Burlap.
Stamp images and trim to 3 3/4" x 5" Layer the two small panels and adhere to the two left-side small sections. And the card is complete.
I cut out and attached a small American flag to the wiper.
Subscribe to:
Posts (Atom)