Our designers will be bringing you some fun and
exciting projects using not only Scor-pal
products, but also, a mix of papers and from Fancy Pants Designs. Of
course, that's not all. The Fancy Pants Designs team is playing with Scor-pal
products this week on the Fancy
Pants Blog.
As always, there a prizes to be won!!
Be sure to visit both the Scor-pal blog and Fancy Pants Blog each day
this week to see more project ideas and to enter for chances to win some great
prizes. To be entered into the random drawing for a Scor-buddy prize
simply leave a comment here on the Scor-pal blog each day for a chance to win.
There will be other ways to earn extra chances
to win as well, so be watching for those announcements each day.
Today's, bonus entry comes by being a fan on
the Scor-pal
Fan page at Facebook Simply "like" us on Facebook and
come back here telling us you have done so.
Deadline for entering is 8am Central, Monday, December 24, 2012.
Our first project this week comes from Scor-pal
Designer Katie Tate
I have a quick little gift idea for you today for our meet up with Fancy Pants!
This is a very easy little box of mini notecards, complete with envelopes ready to give to a loved one. I have made a few of these for gifts this year and even though it is close to Christmas there is still time if you an extra gift to give.
Project Recipe:
Paper - Country Boutique by Fancy Pants
Scoring Tools - Scor-Pal and Scor-Envi
Adhesive - Scor-Tape
For the base of the box start with a piece of patterned paper measuring 5 3/4" square. Score at 1" on all 4 sides. Snip up one side of the mini square formed at the corners to make the flap to form the base.
Add Scor-Tape to the corners and form the base using the scoring tool on the inside corners to make crisp corners.
For the lid use a piece of paper 6" square and score at 1". Then using a border punch create a decorative edge before forming the lid. Snip the corners the same as the base and use Scor-Tape to adhere the flaps to make the corners.
Here you can see how the lid fits.
Using a strip of paper measuring 12" by 1 3/4" score at 2 3/4". 4", 8" and 9 1/4" along the long side. Use Scor-Tape on the overlap to form a belly band to secure the box closed.
Add a sentiment to the belly band to decorate.
Here is the box from the side.
Using the measurements on the Scor-Envi create envelopes for 3" cards. I actually made the cards 3 1/4" square as the envelope allowed a little more space.
Decorate the note cards as desired.
This makes a perfect quick gift, one that will surely be treasured.
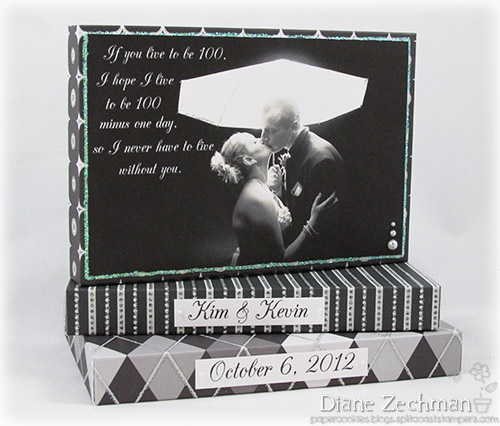
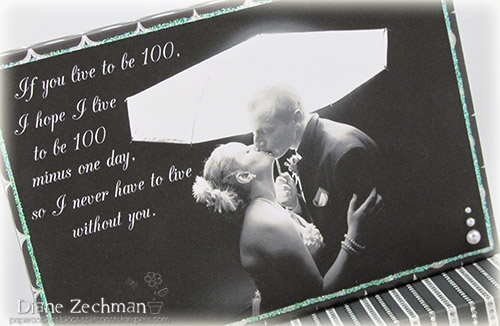
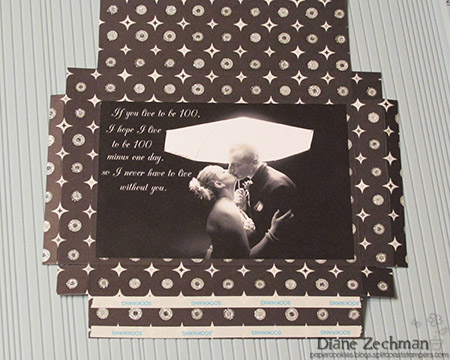
Holiday greetings! A childhood Christmas tradition I fondly remember were the Lifesavers candy box books. Do you remember these? You would open the box and both sides were lined with yummy flavors of Lifesavers rolls. The idea of opening a box book to reveal treats on both sides gave me inspiration to create a Christmas box book display.
Just recently our family was blessed with the arrival of this sweet baby pea! In this photo he is just an hour old. He is so tiny, so adorable, so c-u-t-e ! okay thanks for indulging me tee hee, back to business now...
Supplies: Fancy Pants pattern paper, Scor-pal, Scor-tape, silver jewel diamond wrap, Websters Pages rose trim, dies/punches: Sizzix, EK success, Accucut, Memory box,
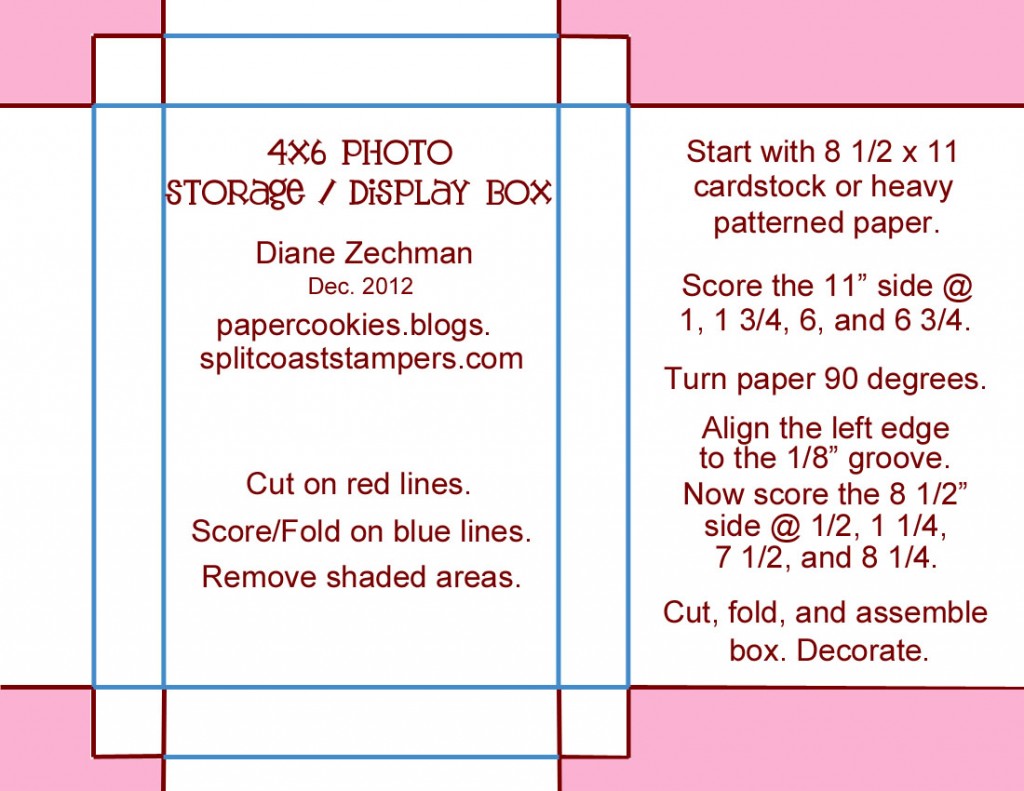
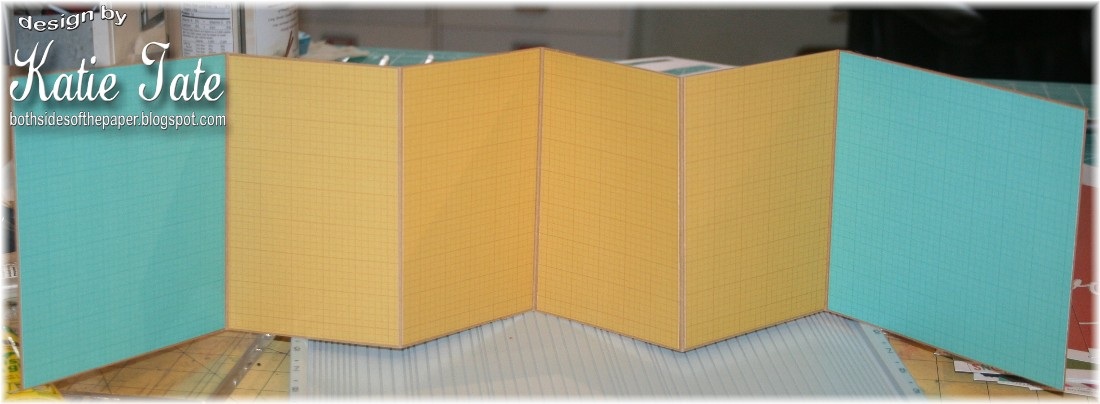
To make the box book base I created a one-sheet-shadow box template. You can create one 6 x 6 shadow box from one 12 x 12 paper and you will need two shadow boxes to create the book.
Start with a 12
x 12 double side pattern paper score at: ¾, 1 ½ , 2 ¼ ,
3, 9, 9 ¾ , 10 ½ , 11 ¼ .
Rotate 90 degrees. Score at ¾, 1 ½ , 2 ¼ , 3, 9, 9 ¾ , 10 ½ , 11
¼
Now score at 3 ¾ and 8 ¼ just to
where it meets the lowest horizontal scored line 3 inches down.
Turn paper 180 degrees and repeat.
Step 2:Cut as shown marked with the solid lines below. The hatched areas are to be discarded.
Note there is a center line cut down the middle of the tabs.
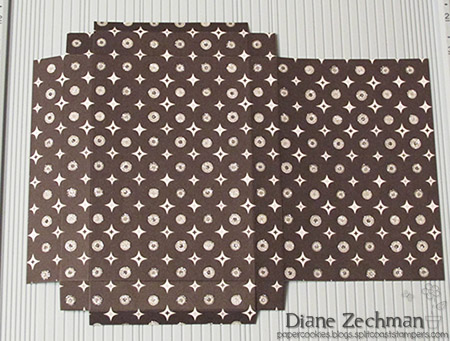
Step 3: Fold along all the the scored lines first to train how the edges will roll in.
Step 4: To start securing the shadow box together, apply Scor-tape to the outside 3/4 inch panel of the shorter edges first (this is side edges WITHOUT the tabs). Roll them in and secure them to the base.
Step 5: Apply adhesive to the outer end flaps, roll and secure them to the base. The tabs are still loose at this point.
Step 6: The top flap of the tab is folded over and secured underneath.
Step 7: The flap remaining is wrapped around the corner and secured along the edge. Repeat for all four corners and you have just created the shadow box base.
Step 8: Repeat steps 1 to 7 to create another shadow box.
Step 9: After you have made 2 shadow boxes, cut a 1 1/2 x 6 inch strip, score in half vertically and mountain fold to make a hinge. Adhere both boxes to this hinge with Scor-tape.
Step 10: Decorate as you wish! Cut 3/4 strips of pattern paper to cover the outside edges and 6 x 6 pattern paper to cover the outside top and bottom. You can use photo corners to cover up the joints or use borders around the edges of the box.
Thanks for staying with me through all these steps. I hope you give this project a try, I would suggest making your first one out of plain card stock so that you see the score-lines better better for cutting around the tabs. Once you've mastered the template, go to town with your pattern paper!


