Showing posts with label Lisa Andrews. Show all posts

Tuesday, September 23, 2014

Fall/Halloween Tutorial with Lisa Andrews


Today is Day 2 of week full of tutorials over at Scor-Pal.  I decided to make a witches hat that holds all of magic of Halloween's past.  

Project recipe:

Various Halloween themed designer paper
Scor-Pal
Scor-Tape
lots of Halloween embellishments
black tulle
ribbon
Wild Orchid flowers
Chipboard
black card stock
white card stock (for making a template)


We need to start by making our template for the top of the witches hat (by the way....this would make a great Santa's hat also!).  I created a triangle that is 8 1/2" tall and 4" wide at the base.  Trace one triangle onto a piece of 12" x 12" piece of card stock.  Then trace a triangle on each side and create a 1/2" lip on each side.  Trace one more free standing triangle.


Trace your template onto black card stock, score and cut out.  Adhere 1/8" score-tape to the lips on each side and attach free standing triangle.


You will now have a square cone that will be the top of the witches hat.  Decorate all nice and fancy.


Next, create a box for the inside of the hat that measures 5 3/4" square, score 1" on each side to create a box that will hold an accordion of photos.


Now we will create the accordion that will hold your photos.  Cut four strips of paper 3 5/8" x 11", score one side at 3 5/8", turn the paper over and on the opposite side of the first score, score again at 3 5/8".  You will have a strip of paper with a mountain score on one side and a valley score on the other.   3 5/8" is where the first arrow is on the top fence of your Scor-Pal.  Attach the four strips together, as shown above to create an accordion.


Attach the accordion to the inside of the square box.

The brim of the witches hat is a 10 1/2" circle cut from chipboard.  I painted the circle with Distress Ink, Black Soot.  I attached black tulle in a circle to the chipboard and then attached the box on top of that.


I hope you enjoyed my project.   Stop by Scor-Pal all this week to see what the other designer have created!

Monday, August 18, 2014

Back to School Tutorials with Scor-Pal - Lisa Andrews

Well it is that time again, almost Back to School, and the Design Team here at Scor-Pal have a wonderful week planned for you with tutorials featuring projects based around school!
We will have ideas to go in your kids backpacks, gift ideas for teachers and much more!
We hope you will enjoy them and please pop by to our designers and leave them a little love, I'm sure they will love to know you visited :)

Hi everyone!

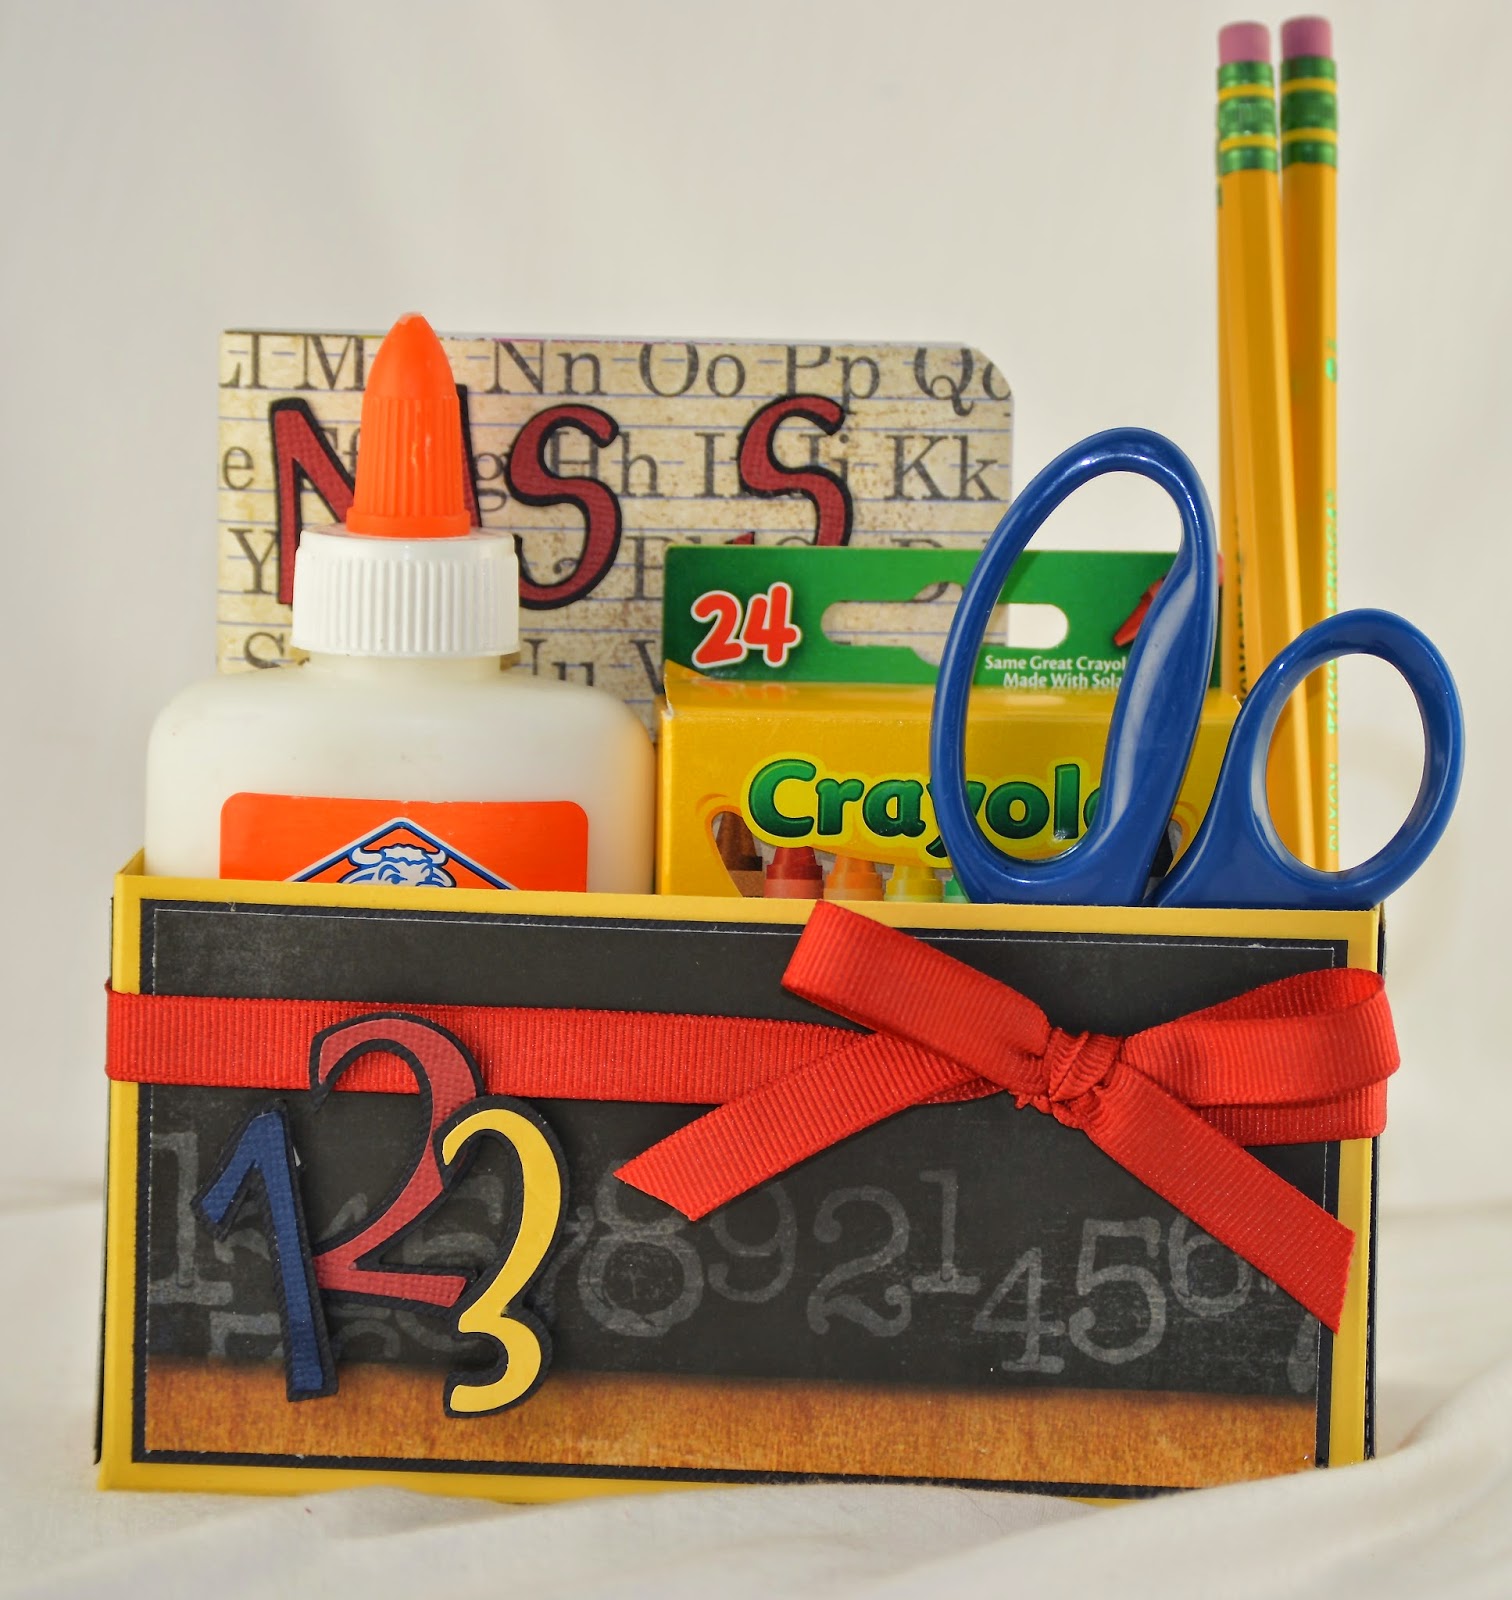
It's me, Lisa Andrews.  This week the Scor-Pal designers are showcasing Back to School projects.  Today, I made a quick and simple little school supply holder.


To start, cut a piece of card stock 7 1/2" x 9".  With the 9" side on the top fence, score at 1 1/2" and 
7 1/2".  Turn your paper so the 7 1/2" side is on the top fence, score at 3" and 4 1/2". 


 Adhere your box together with Scor-Tape.


The finished box measures 6" x 1 1/2" x 1 1/2".  Now it is time to decorate.  Fill with school supplies.  I found a cute little notebook that I covered with Bo Bunny paper and put our teacher's name on it.


Supplies:

Scor-Tape 1/4"
Bo Bunny designer paper
yellow, black, blue and red card stock
Cricut George Cartridge (for numbers and Ms. S)
Red ribbon

Thanks for stopping by! Be sure to visit everyday for a new project.

Lisa


Thursday, March 27, 2014

Quick and Easy Easter Cards with Lisa Andrews

If you are looking for our challenge you will find the details HERE

Hi everyone!  The Scor-Pal design team is sharing some quick and easy to make Easter cards.  Today I have created an easel card for you!


I started with a sheet of card stock cut 12" x 6", score with the 12" side on the top fence scoring at 3" and 6".

The center "pop-up" part of the card is a 5" square.


The wreath is was cut with Spellbinder Die Build A Wreath using yellow and pink card stock.  The adorable little owl was made with Darcy's Eggstra Special Tin Pins and Stamp set.  The little Easter eggs with stamped then cut out, they can also be found in the Eggstra Special stamp set.

Thanks for dropping by!  Have fun creating!

Lisa


Thursday, December 12, 2013

Quick and Easy Holiday Cards with Lisa Andrews

Today we have a Quick and Easy card from Lisa.


Christmas is just around the corner and making a quick and easy card could never be easier!
Here is how I made my gatefold card.


First I started with a piece of card stock 4" x 8", a piece of designer paper 3 3/4" x 3 3/4", a memory box die cut from a sparkly glitter paper and a piece of designer cut with Spellbinders Nestibilities Label 16 Die, my Scor-Pal, Scor-Tape and a sparkly gem from Stampin Up!


Score the card stock at 4" and 6" to create your gatefold. 


Next, cut the piece of designer paper in half so you have two pieces that are 1 7/8" x 3 3/4".  Attach them to the front of the card with Scor-Tape.  Add the Label, sentiment, Snowflake die and gem and you have a nice and easy Christmas card ready for the giving!


Thanks for stopping by and I hope you have a wonderful Holiday Season!!

Lisa


Tuesday, April 2, 2013

Bunches of Beautiful Boxes with Lisa Andrews


Welcome!  Thanks for stopping by today!  Today I have created a Secret Little Box, inspired by THIS box by Norma Lee.  I just love little surprises and secret little hiding places, so I had a create a box that delivered both!  I hope you enjoy my tutorial.

Supplies:

Teresa Collins Designer Paper
bling
Tilda with Eggs by Magnolia
Memory Box Die
Magnolia Doo-Hickey, Hearts and Swirls and Butterfly
Card Stock

Copic Markers:
Skin:  E00, E21, E11, E23
Hair: E41, E42, E43, E57
Clothes:  BG0000, BG10, BG15, BG90

Here are all the pieces you will need for our box.

12" x 6" piece of card stock
(3) 4 7/8" squares of card stock
(2) pieces of 3" x 3" card stock

To create the drawers, using a 4 7/8" square of card stock, score 7/8" on each side.  Construct your drawer.


Next, we are going to create the base for our secret box.  Using the 12" x 6" piece of cardstock, score at 1 1/2", 4 1/2", 7 1/2" and 10 1/2".  Cut out the middle section, 4 1/2" to 7" 1/2" as shown below.


Attach the 3" x 3" pieces of card stock to your box as shown below.  I decorated the panels before attaching them. 
Next attach the drawers into place.  When attaching top drawer, be sure not to attach to the front panel, this is where it will tuck in to secure the box closed. 


Here are a couple more views


Thanks for coming by!  Happy Spring!

Lisa A.

Thursday, February 21, 2013

Flower Pot Pocket Card by Lisa Andrews


Hello! Lisa Andrews here and I am so glad you stopped by today!  Today I am featuring my own little twist on the Flower Pot Pocket Card.  It's very fussy and fancy, but that is just how I like it!


Supplies:
Scor-Pal
Scor-Tape
Memory Box Heart Die
Memory Box LaRue Heart Die
Fancy Pants patterned paper
Wild Orchid Craft lace and flower


Start with a piece of card stock that measures 3 1/2" x 7 3/4", score at 3 1/4" (valley fold) and 6 1/2" (mountain fold).  Then fold as follows:


Next, I used a heart die from Memory Box for the "flower pot" part of my card.


I used a Scor-Tape Sheet and the LaRue Heart from Memory Box for the filigree pattern on the front of the heart.


Next I went crazy decorating with all sorts of hearts, some lace and ribbon and some sparkly paper!

Thanks for stopping by!


Monday, February 11, 2013

Activity Book by Lisa Andrews


Hi everyone!  Today I am sharing with you an activity book that I created using The Portfolio Collection from Pink Paislee.  I was such a great collection to work with.  I just love all of the embellishments and chip boards!  

Supplies:
The Portfolio Collection from Pink Paislee
coordinating card stock
Scor-Tape
white feathers
brads


First, start by cutting two pieces of card stock, the first one is 11" x 6", score at 5" and 6".  The second one is 7" x 6", score at 5" and 6".


Attach them together with Scor-Tape to create a book. Decorate the outside and the inside.


For the pouch on the inside, use a piece of 6" x 3 1/2" card stock and score at 1/2" and 1" on three sides, decorate and attach to the inside of your book.


To make the little booklets, I made two, the sheet of paper on the inside of the book measure 2 7/8" x 2 7/8".  The cover is 6 1/4" x 3", score at 3" and 3 1/4".  Place pages on the inside of the book and punch two holes for the spine.  I used baker's twine to tie them together.


I hope you enjoyed my project today!!  I had lots of fun making it!


Friday, February 8, 2013

Desk Calendar by Lisa Andrews


Hi everyone, Lisa Andrews here!  
I made a cute Desk Calendar using my Scor-Pal and the Awesome collection from Simple Stories.  

Supplies:
card stock
various brads
adhesive numbers
acetate
date stamps


To create the drawer, start with a 4 1/2" x 4 1/2" square of cardstock, score 1" on all sides to create the drawer.  Tip:  I decorate the drawer front and positioned my brad before I assembled my drawer.  Next, for the drawer wrap.  Start with a piece of cardstock 3" x 9", score at 1", 4", 5" and 8".  Create the wrap and place the drawer inside.


The calendar pages are 2 1/4" x 1 3/4".  I used a 1" and 3/4" circle punch for the calendar pulls and used coordinating brads for each month. 

Use the drawer to store the off months.  The easel card on top measures 2 1/2" x 5 ", score at 1 1/4" and 2 1/2".  I used a 2 1/4" square of acetate adhered with brads to slide the months into.