Hi everyone, Janice Whiting here! Today, I'm excited to show y'all a different design to the card purses I make. To start off, here is a picture of the total ensemble.
I thought using Spellbinders Grand Circles dies would be perfect for a bit of a retro style card purse, don't you think? :) The paper collection I used for this ensemble is called "The Neapolitan Collection" from Recollections and I think it fits my retro theme perfectly!
And here is one of the cards. This ensemble comes with six cards, six coordinating envelopes and the purse to keep them all in. :) The ribbons are Webster's Pages and the hello greeting is from a Hero Arts stamp set.
The How-to
To start off, die cut three of the Grand Circles dies in chipboard (I used some old cereal boxes that I kept for such a purpose), three in the paper you want for the out side and three for covering the inside.
Using my Scor-Pal, I scored all my purse flap sections (chipboard piece and both inside and outside flap coordinating paper pieces) at 1 1/2" and 4 1/2". Once they are scored, adhere them to form the finished flap.
Cut the other two pieces of chipboard and the other pieces of pattern paper at 1 1/4", then adhere the pattern paper to both sides, thus creating the finished side walls of the purse (forgot to snap pictures of this process, sorry!)
To create the inside pockets, cut a piece of pattern paper to 9 3/4" x 4 1/2". As shown below, score at the 1/2" mark and 2" mark on both ends. Turn the paper vertically and score at the 1/2" and 2" mark on just one side.
Here I've show the sections that need to be cut out.
Fold the flaps in and adhere to purse sidewalls.
To unite the two sides together, cut a piece of pattern paper to 5 3/4" x 3", scoring lengthwise at 1 1/2". Adhere to bottom sections of the pockets. This step can be done before or after adhering the pockets to the sidewalls, just make sure you adhere the pockets at the exact place on both walls (I adhered mine as far down on the wall as possible, about 1 1/2" from the bottom.
Here you can see the pockets united together with the bottom piece and also, adhere to both side walls.
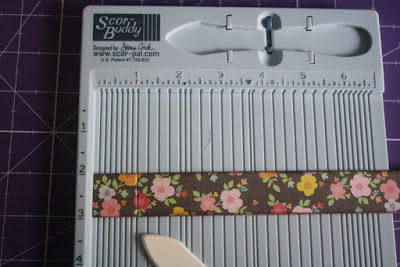
Next, cut two strips of pattern paper that are 1" x 12" and glue them together, I also inked up my edges once they were glued. Score the strip at 1" on both ends, this will become your purse handle. (You can see I used my Scor-Buddy to score this strip of paper. It is a really handy size!)
Adhere the purse flap to the side walls by gluing the back side with a strong adhesive, either hot glue or an adhesive like Beacons 3-in-1. Then you can adhere the handle to the center of the purse flap.
Attach a velcro dot to the inside front of the purse flap and the outside of the purse's front sidewall.
I used Spellbinders Doily Motifs dies to create the purse latch, adding some Bitty Blossoms and Foliage dies for embellishments.

Because the purse is round, if you don't attach something under the purse to stabilize it, it will not stay up straight. In this pic, I show you what I came up with.
Simply, score a piece of 1 1/2" x 6" paper three times at the 1 1/2", 3", and 4 1/2" mark. Fold then adhere to the bottom of the purse.
Well, thanks so much for stopping by! I hope this has inspired you to give it a try! These make great teacher, hostess or whomever gifts!
Janice


9 comments:
Thanks for posting this tutorial. Love your card holder.
Edie
Wow, this card holding purse ROCKS.
I now know what I am making for Christmas gifts this year. Thanks Janice for the tutorial.
-Cher
Wow. What a fun design. Definitely would make a great gift for someone special.
Wow! I must try this! Imagine giving this to someone as a gift filled with beautiful cards!!! Fun!
This is so cool....I love it...and your right ...would be a great teacher/host gift...thank you so much for sharing this with us....
Wow! Great work; thank you for the tutorial.
Marie d.
Wow! Great work; thank you for the tutorial.
Marie d.
So cool. I love it!
Very sweet Janice! I really like your solution to keep the purse from tipping!
Post a Comment