Showing posts with label SEI. Show all posts

Wednesday, July 10, 2013

Scor-pal and Clearsnap with Jennie Harper

 This week the DT's from Scor-Pal and Clearsnap have joined forces to bring you some amazing projects.  Be sure to check the Scor-Pal Blog and the Clearsnap Blog everyday for inspiration, and also to enter to win a Scor-pal!  Just leave comments this week on any of our Scor-pal posts, and we will choose a winner next week.

Hi Scor-Pal fans!  It's Jennie and I wanted to share a project I created for our Clearsnap ~ Scor-Pal Blog Week. Using a Scor-Pal, I created sour cream containers, which are perfect for holding little candy treats!
Supplies:
Ink: Clearsnap Licorice and Spray inks
Stamps: Petal Party Penny Black
Cardstock: Gina K. Designs 
Patterned Paper: SEI 
 Tool: Scor-Pal scoring board 
Bling: Want2Scrap
Adhesive: Scor-Tape
Scissors
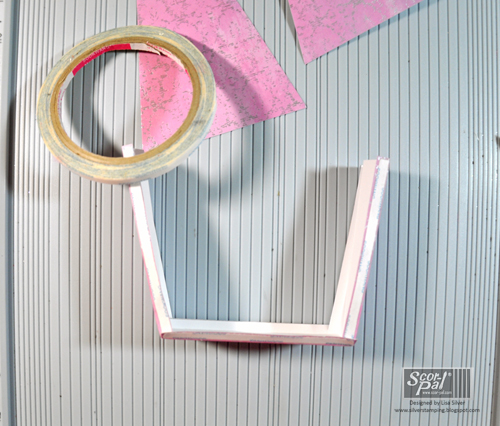
Take 4 1/4 x 5 1/2" panels of patterned paper and apply Scor-Tape to three sides (2 long and 1 short).

 Roll 2 short sides together to overlap to form a roll (repeat for others).
Pinch one of the ends together to form a seam in the middle. Using Scor-Pal, score the bottom edge up to the 1/2" mark. This gives the impression of crimped edges.
 Add treats and seal other edge (scoring again).
 Gather supplies to make flower accents.
 Spray ivory cardstock with ink spray.  Then, stamp floral image and trim.
 Adhere to sour cream containers.
This is very easy to do and hope you will give it a try soon!   
Thanks so much for stopping by and I hope you have a wonderful day! 
Blessings, 

Tuesday, June 25, 2013

Scor-Pal and Heartfelt Creations with Katie Tate

Today is my turn to share my project for the week of projects on the Scor-Pal and Heartfelt Creations blogs.
Now we all given birthday cards and often flowers too so I decided to use both of those ideas and make a pot of Birthday Flowers!
It is just as great as a card and the flowers are everlasting!


Project Recipe:
Scoring Tool - Scor-Pal
Adhesive - Scor-Tape
Patterned Papers - SEI
Lace - Hobby Lobby
Leaf, Flowerpot and Tag Die and Leaf and Sentiment Stamp - Stamps and Dies by Heartfelt Creations
Buttons - Unknown
Paint - Apple Barrel
Dowel - Walmart
Embossing Enamel - Aged Green by Stampendous


Here you can see the base items to create the flower pot. The leaves were stamped first and then cut with the matching die.

The flower pot is created from 4 die cuts of the pot, 4 strips of cardstock measuring 3 3/4" by 1" scored at 1/2" along the short side. The base of the pot is a square measuring 3 5/8" scored at 1/2" on all sides and the corners snipped as in the photo to create the base.

Add Scor-Tape to the edge to ensure a good adhesion.

Attach the 4 pots together in a row.

Make the base of the pot and add one edge to the bottom of one of the pots as in the photo.

Continue connecting the base to the pots using the bone folder on the inside edges to create crisp and firm corners.

The completed pot should look like this.

Cut flower foam to fit the inside for you to add your flower stems.

For an extra I added embossing enamel to the leaves but this is optional.

To decorate the pot create rosette flowers from strips of punched papers measuring 12" by 1" and 12" by 1 1/2 scored at the scalloped of the punched design. Paint the doweling to make the stems. Cut the doweling into various lengths and attach rosettes with hot glue. Add buttons to the centers of the flowers and add the die cut leaves to the stems.

I finished the decoration with a sentiment stamped onto the two die cut tags.


The recipient will get to enjoy them a lot longer than a regular bunch of flowers.
Katie

Wednesday, June 5, 2013

May Arts and Scor-Pal with Jennie Harper

Hi Scor-Pal fans!  It's Jennie and I wanted to share a project I created for our May Arts ~ Scor-Pal Blog Week. Using a Scor-Pal, I created a Tea Bag Holder (using Beate Johns tutorial from Splitcoaststampers).
Supplies:
 Patterned Paper: SEI
Stickers: SRM Stickers
Ribbon: May Arts
Adhesive: Scor-Tape
Scissors

Take a 3 1/2" x 7 3/4" piece of cardstock and score at 3 1/2" and 4 1/4".
 Fold on score lines.
 Take a 6 1/2 x 7 piece of patterned paper (lining up the 6 1/2" side  up to the top of the Scor-Pal) and score at 1/2" and 3 1/2". Prefold on the score lines.
 Apply Scor-Tape to 1/2" section of the paper.
 Remove tape lines, fold paper over, and rub to set adhesive.
Align paper sleeve up on Scor-Pal and score at 3 5/8" (the upside down triangle). Turn 180˙ and score again.
 Prefold on score lines. Cut a half circle off each end using a circle punch.
Using Scor-Tape, adhere the center of sleeve to inside of pre-scored cardstock panel.
Decorate as desired using May Arts ribbon to close.
 Hope you will try making one of these yourself!!  If you do be sure to leave me a comment as I would love to check it out!! 

Friday, May 31, 2013

Scor-Pal and Paper Smooches with Lisa Silver

Hi everyone, This week the designers from Scor-pal and  Paper Smooches  have an awesome blog hop for you.  Be sure to stop by everyone's blog to see what they've been up to.  Scor-Pal will be giving away 3 prizes packages - each one includes a Paper Smooches stamp that we've shown this week as well as Scor-tape. Leave comments on the Scor-Pal blog this week for your chance to win!
Hello everyone!  I am super excited to be participating in this hop with Paper Smooches and the Scor-Pal Design Team!

Please stop by the Scor-Pal and Paper Smooches blogs for a chance to win!


Purse Gift Box

Supplies:
Tools: Scor-Pal scoring board in inches, Scor-Tool, Scor-tape, Scor-Mat cutting and work surface
Stamps: Retail Therapy (Paper Smooches)
Paper: Diane Assortment Paper Collection by S.E.I., Shrink film by Graphix
Ribbons / Trim: silver cord (ST2S) , pink mini cording (449-17) , and crocheted lace trim (433-38-01) by May Arts
Ink: Jet Black StazOn by Tsukineko
Other: heat tool, punch by EK Success (scallop), pencil, ruler, hole punch, Velcro


I was inspired by the Retail Therapy (Paper Smooches) stamp set to create a unique gift box for the ladies in your lives.


Step 1:

Trim a 2" x 12" piece of cardstock for the base and sides of your purse box.


Score according to the template below.


Add Scor-tape to the 0.25" edge and snip at 4" and 8" marks to the 0.25" score so the sides with fold upward.


Step 2:

Trim two pieces of cardstock 4" x 3-7/8".

Create the front and back panels of your purse box according to the template below.  Make a small score mark at 1" and 3" to note where the top needs to slim.  Use a scissors or a paper trimmer to remove the top corners.

Create two identical pieces.


Step 3:

Adhere the front and back of the purse to the bottom of the box (prepared in step 1).


Adhere the sides to the front and back of the box.  Set aside as we prep the top the purse box.


Step 4:

Trim a piece of cardstock 2-1/2" x 3" in a different color paper than the box base.

Score and trim according to the template below, creating it similarly to how the front and back of the box was created.  Note that the top of the box will need to be slightly smaller than the 2" opening of the box for a better fit.

Add Scor-tape along the 0.25" scored edge and adhere to the top (inside edge) of the box.


Step 5:

Add decorative trim, a cord handle and a Velcro closure to the box to finish.


Step 6:

Stamp the image or sentiment on Shrink Film with the StazOn ink.  Punch out your shape.

IMPORTANT: Punch a hole in the top of your piece before you heat.


Step 7:

You can either follow directions on the package to shrink in your oven - OR - you can use your heat gun to shrink.

IMPORTANT: Please use a heat safe surface.  Your Scor-Mat cutting and work surface is not heat safe and will warp.

If you do use your heat gun, use a piercing tool to hold the piece in place.  I usually opt to insert the tool into the punched hole, so it will remain open while I heat.  Also, I keep an acrylic block near.  While the piece is still hot, I will use the block to flatten any stubborn or curled edge.


Use the little plastic tag as an embellishment to your newly created purse box.  It reminded me of the tags or key fobs you might see on high-end purses... and it's a lovely way to make the simple very special.


Thanks for visiting!
Lisa