Friday, May 31, 2013

Scor-Pal and Paper Smooches with Lisa Silver

Hi everyone, This week the designers from Scor-pal and  Paper Smooches  have an awesome blog hop for you.  Be sure to stop by everyone's blog to see what they've been up to.  Scor-Pal will be giving away 3 prizes packages - each one includes a Paper Smooches stamp that we've shown this week as well as Scor-tape. Leave comments on the Scor-Pal blog this week for your chance to win!

Hello everyone!  I am super excited to be participating in this hop with Paper Smooches and the Scor-Pal Design Team!

Please stop by the Scor-Pal and Paper Smooches blogs for a chance to win!


Purse Gift Box

Supplies:
Tools: Scor-Pal scoring board in inches, Scor-Tool, Scor-tape, Scor-Mat cutting and work surface
Stamps: Retail Therapy (Paper Smooches)
Paper: Diane Assortment Paper Collection by S.E.I., Shrink film by Graphix
Ribbons / Trim: silver cord (ST2S) , pink mini cording (449-17) , and crocheted lace trim (433-38-01by May Arts
Ink: Jet Black StazOn by Tsukineko
Other: heat tool, punch by EK Success (scallop), pencil, ruler, hole punch, Velcro


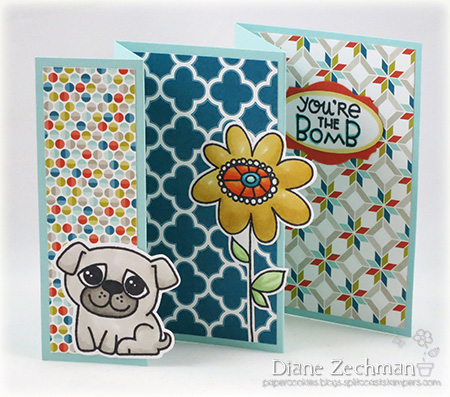
I was inspired by the Retail Therapy (Paper Smooches) stamp set to create a unique gift box for the ladies in your lives.


Step 1:

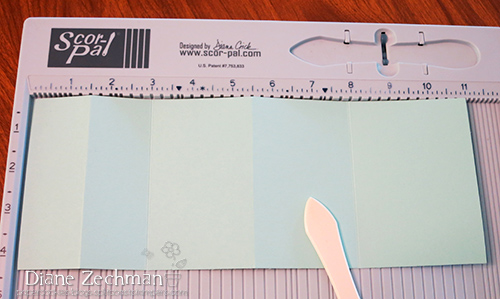
Trim a 2" x 12" piece of cardstock for the base and sides of your purse box.


Score according to the template below.


Add Scor-tape to the 0.25" edge and snip at 4" and 8" marks to the 0.25" score so the sides with fold upward.


Step 2:

Trim two pieces of cardstock 4" x 3-7/8".

Create the front and back panels of your purse box according to the template below.  Make a small score mark at 1" and 3" to note where the top needs to slim.  Use a scissors or a paper trimmer to remove the top corners.
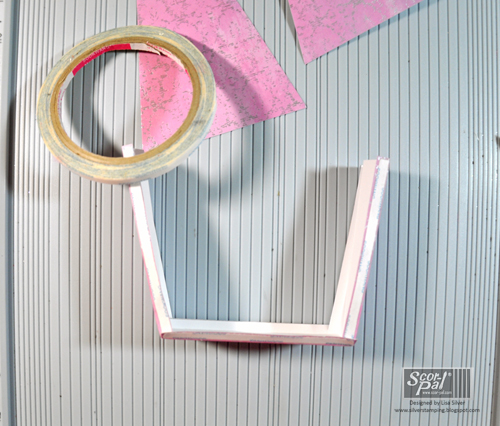
Create two identical pieces.


Step 3:

Adhere the front and back of the purse to the bottom of the box (prepared in step 1).


Adhere the sides to the front and back of the box.  Set aside as we prep the top the purse box.


Step 4:

Trim a piece of cardstock 2-1/2" x 3" in a different color paper than the box base.

Score and trim according to the template below, creating it similarly to how the front and back of the box was created.  Note that the top of the box will need to be slightly smaller than the 2" opening of the box for a better fit.

Add Scor-tape along the 0.25" scored edge and adhere to the top (inside edge) of the box.


Step 5:

Add decorative trim, a cord handle and a Velcro closure to the box to finish.


Step 6:

Stamp the image or sentiment on Shrink Film with the StazOn ink.  Punch out your shape.

IMPORTANT: Punch a hole in the top of your piece before you heat.


Step 7:

You can either follow directions on the package to shrink in your oven - OR - you can use your heat gun to shrink.

IMPORTANT: Please use a heat safe surface.  Your Scor-Mat cutting and work surface is not heat safe and will warp.

If you do use your heat gun, use a piercing tool to hold the piece in place.  I usually opt to insert the tool into the punched hole, so it will remain open while I heat.  Also, I keep an acrylic block near.  While the piece is still hot, I will use the block to flatten any stubborn or curled edge.


Use the little plastic tag as an embellishment to your newly created purse box.  It reminded me of the tags or key fobs you might see on high-end purses... and it's a lovely way to make the simple very special.


Thanks for visiting!
Lisa

Scor-Pal and Paper Smooches With Lori Williams

Happy Friday everyone,  I hope you have been enjoying our week long hop sponsored by Scor-pal and  Paper Smooches  and our talented design teams.  Remember  to stop by everyone's blog to see what they've been up to.  Scor-Pal will be giving away 3 prizes packages - each one includes a Paper Smooches stamp that we've shown this week as well as Scor-tape. Leave comments on our posts this week for your chance to win!
 
I'm thrilled to be able to share my project with you today highlighting a short and simple tutorial to make any project pop, decorate rosettes. 

Rosettes are so simple to create but you really can take them to the next level with decorative punches or dies.  


Step 1. Cut two  12 x 2" inch strip of decorative paper.  I've cut mine with a decorative border die, but you could also use a punch.  Using your Scor-Pal, score the entire strip every 1/2, do the same on the second strip.
 
Step 2: Fold and crease all your folds with the Scor-Tool to create crisp edges. 
Step 3: Once you have both strips folded, apply Scor-Pal tape to the end of one of you pieces and join to the other.  This will make a long strip as shown in the picture above. 
Step 4: Tape your ends together to form a  circle. Punch out a circle from scrap card stock and cover with Scor-Tape.  
Step 5: Push down on your circle on top of the tape scrap circle and you'll form a beautiful rosette like the one above ready to add to and enhance your projects. 
I topped mine off with an adorable piece cut stamped image from the " Retail Therapy" stamp set by Paper Smooches
Now remember to visit all the designers blogs from the Scor-Pal design team and the Paper Smooches Team and have fun.  

Thursday, May 30, 2013

Scor-Pal and Paper Smooches Week with Diane Zechman

Hi everyone, This week the designers from Scor-pal and  Paper Smooches  have an awesome blog hop for you.  Be sure to stop by everyone's blog to see what they've been up to.  Scor-Pal will be giving away 3 prizes packages - each one includes a Paper Smooches stamp that we've shown this week as well as Scor-tape. Leave comments on our posts this week for your chance to win!

Woohoo! The Scor-Pal DT has teamed up with the gals at Paper Smooches this week! Fun fun fun! I have 2 cards to share today using a Scor-Pal and the new PS set called Slang Gang. For my first one I made Diana's Accordian Fold Card. Along with the Slang Gang sentiments, I also used the super cute Woofers and Tweeters and Friendly Flowers.


Start with a 4 1/4 x 11 piece of cardstock. I changed the directions slightly and kept the paper aligned with the left side as I normally place it. With a Scor-Pal, score the long side @ 1 1/2, 3, 5 1/2, and 8. Then mountain/valley fold (accordion fold) starting with a mountain.

Your dsp layers are 1 1/4 x 4, 2 1/4 x 4, and 2 3/4 x 4. Then decorate as desired. After stamping and coloring my images, I fussy cut them and attached so they hung over the edges a bit. (The Woofers dies are on my must-have list!!)
 
 My second card is a CAS one. I used several of the Slang Gang sentiments together as the focal point of the card.


 After masking off the left side with post-it notes, I sponged a rainbow of colors on the right. Then I over-stamped the words with the same colors (minus the yellow). "really?" was stamped with black and then I scored both diagonal and vertical lines to give it some definition. (The vertical scores are hard to see). Check out the Scor-Pal blog for lots more inspiration! Accordian card: stamps- Paper Smooches Slang Gang, Woofers and Tweeters, and Friendly Flowers; paper- Pool Party, Tangerine, white, Sycamore Street dsp; ink- Memento Tuxedo Black; accessories- Scor-Pal, Copics, SU! Oval and Designer Label punches. CAS card: stamps- Paper Smooches Slang Gang; paper- white; ink- Cherry Cobbler, Pumpkin, Daffodil Delight, Celery, Marina Mist, Elegant Eggplant, Memento Tuxedo Black; accessories- Scor-Pal.

Scor-Pal and Paper Smooches Week with Tya Smith

Hi everyone, This week the designers from Scor-pal and  Paper Smooches  have an awesome blog hop for you.  Be sure to stop by everyone's blog to see what they've been up to.  Scor-Pal will be giving away 3 prizes packages - each one includes a Paper Smooches stamp that we've shown this week as well as Scor-tape. Leave comments on our posts this week for your chance to win!

Hi there - Tya here with my take on the fun swap that we got to participate in with Paper Smooches. They absolutely have the cutest, most whimsical stamps out there that are totally right up my alley!
I got to use the new stamps set called Think Fast. It featured lots of darling food shapes. I decided to make a fun little gift card holder/card to give to your special someone when you need a  lunch date! I was inspired by a pin that I had on Pinterest, like this one  here, I just changed the measurements and made it a single pocket instead of a double. Here's how I made it:
Greeting Card with Gift Card Holder Pocket

Supplies:
Think Fast stamp set by Paper Smooches
6x6 paper pad from My Minds Eye Collectable papers
Buttons
Twine
 6 x 11 Red cardstock 
Kraft cardstock 3 1/2 x 4 1/4 and 3 x 5 1/2
Scallop border punch

Step 1- On the 11 inch side of the red cardstock, make score marks at the Triangles on the Scor-pal. (these are the marks you would use to make a brochure fold)


Step 2- On the 6 inch side, score at 1 1/2 and 3 inches.

Step 3- Trim away the bottom and middle sections as shown. NOTE: its ok if you have score marks left on the sections showing. This is just meant to be a card base and you will eventually cover these with other papers.


Step 4-
Now you will choose 3 different pattern papers to cover the card base.

These measure 3 1/2 x 5 3/4 (stripe), 3 1/2 x 4 1/4  (green dot), 3 1/2 x 2 3/4 (yellow)

Add these layers to the card as shown:

Step 5- Add Scor tape as shown to make the front pocket:


Step 6- Decorate the card as shown:
Banner is 1 x 3 inches, Kraft cardstock on left side is 3 1/2 x 4 1/4, Kraft cardstock on right side is 
3 x 5 1/2, white cardstock is 2 1/2 x 4 1/4. Add  sentiment  and soda cup stamp. Add button and twine.

Kraft paper border strip 1 x 3 1/2 - used a scallop border punch. Red cardstock is 2 1/2 x 2 1/2, Red stripe paper is 2 x 2. Add sandwich stamp and buttons.

Thanks for joining me!


Wednesday, May 29, 2013

Scor-Pal and Paper Smooches Week with Katie Tate

 Hi everyone, This week the designers from Scor-pal and  Paper Smooches  have an awesome blog hop for you.  Be sure to stop by everyone's blog to see what they've been up to.  Scor-Pal will be giving away 3 prizes packages - each one includes a Paper Smooches stamp that we've shown this week as well as Scor-tape. Leave comments on our posts this week for your chance to win!
 
Today I'd like to share my creation for the cross promotion on both the Scor-Pal blog and the Paper Smooches blog

As the set of stamps I worked with were food orientated I decided to go with an explosion box designed to look like a picnic basket :)


Project Recipe:
Picnic Paper - Hobby Lobby
Stamp Set - Think Fast by Paper Smooches
Grass Border Punch - Fiskars
Scoring Tool - Scor-Pal
Adhesive - Scor-Tape


In a 12" square piece of cardstock score at 4" on all 4 sides.


Burnish all score lines and trim away the squares formed at the 4 corners as shown in the photo.


Decorate as desired


For the lid you need a square measuring 7 1/8". Score at 1 1/2" on all four sides.


Burnish all score lines, snip up to the first score line on the squares formed at the corners (to make the flap to make the corners of the lid) and add Scor-Tape to the flaps as shown in the photo.


Form the lid being adhering the flap to the inside edges and burnish on the inside to form crisp corners.


The lid should be only just slightly larger than the base so that it hold the sides of the explosion box in place.
Decorate the lid as desired.


Use a 12" strip of cardstock to make the handle (it is only a decorative handle, if the box is lifted by the handle the box will open)


Add the handle to the lid and decorate the rest of the box as desired.


Finally on the inside of the box add mats for you to add photos to.
I hope that you have enjoyed my project.