Tuesday, July 30, 2013

Special Treats from Guest Designer Janice Whiting

Hi, everyone!  Janice Whiting here bringing you a cute little treat box tutorial.  :)  Here is the finished product:


I'm participating in a fun swap in a couple of weeks and I created this box to house my little treats.  :)  I love being able to customize my treat box to fit whatever size treat I decide to put in it. The final dimensions of this box is 4"x4"x2" and fit my super-sized chocolate chip cookies perfectly!

Tutorial

 You will need a piece of clear packaging for the window, an 8"x 12" piece of sturdy patterned paper, and a 8" x 2 1/2" piece of sturdy patterned paper.


Using your Scor-Pal, score and cut out the sections shown in the diagram below:

If you want to include the window, cut out a square in the center of the top 4x4 section.  I used Spellbinders basic square die to cut out my window.  The complete scored and trimmed sections are shown below with the bottom piece adhered.


Next, die cut the next size up square die in the clear packaging and adhere to the underside of the box lid.


 Now you are ready to start putting the box together! Attach the bottom scored flaps to the inside of the walls of the bottom section of box.


 Now, adhere the other side flaps to the inside of the back wall of bottom section of box.

The bottom section of box is now assembled.

 Next, attach the side flaps of the lid to the inside of the lid side walls.

Your box is now complete!

I used some Jillibean Soup baker's twine, a Prima flower, Spellbinders Back to Basics tag and a greeting from an Anna Griffin stamp set to embellish my box. The patterned paper is from Recollection's Yesterday Today Tomorrow paper pad.

Thanks so much for stopping by!  I hope you found this tutorial to be easy to follower!  If you have any questions please feel free to leave a comment in the comments section and I will do the best I can to help you out!

Have a wonderful day!
Janice :)


Friday, July 19, 2013

Introducing Guest Designer Janice Whiting

Hi everyone, Janice Whiting here!  Today, I'm excited to show y'all a different design to the card purses I make.  To start off, here is a picture of the total ensemble.

I thought using Spellbinders Grand Circles dies would be perfect for a bit of a retro style card purse, don't you think? :)  The paper collection I used for this ensemble is called "The Neapolitan Collection" from Recollections and I think it fits my retro theme perfectly! 

And here is one of the cards.  This ensemble comes with six cards, six coordinating envelopes and the purse to keep them all in.  :)  The ribbons are Webster's Pages and the hello greeting is from a Hero Arts stamp set.

The How-to

To start off, die cut three of the Grand Circles dies in chipboard (I used some old cereal boxes that I kept for such a purpose), three in the paper you want for the out side and three for covering the inside. 


 Using my Scor-Pal, I scored all my purse flap sections (chipboard piece and both inside and outside flap coordinating paper pieces) at 1 1/2" and 4 1/2".  Once they are scored, adhere them to form the finished flap.

Cut the other two pieces of chipboard and the other pieces of pattern paper at 1 1/4", then adhere the pattern paper to both sides, thus creating the finished side walls of the purse (forgot to snap pictures of this process, sorry!)

To create the inside pockets, cut a piece of pattern paper to 9 3/4" x 4 1/2".  As shown below, score at the 1/2" mark  and 2" mark on both ends.  Turn the paper vertically and score at the 1/2" and 2" mark on just one side.

Here I've show the sections that need to be cut out.

Fold the flaps in and adhere to purse sidewalls.

To unite the two sides together, cut a piece of pattern paper to 5 3/4" x 3", scoring lengthwise at 1 1/2".  Adhere to bottom sections of the pockets.  This step can be done before or after adhering the pockets to the sidewalls, just make sure you adhere the pockets at the exact place on both walls (I adhered mine as far down on the wall as possible, about 1 1/2" from the bottom.

 Here you can see the pockets united together with the bottom piece and also, adhere to both side walls.


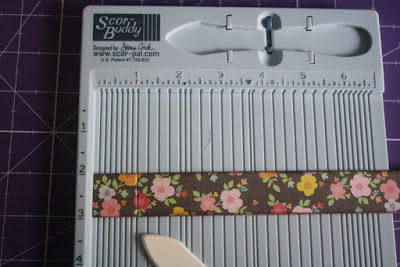
Next, cut two strips of pattern paper that are 1" x 12" and glue them together, I also inked up my edges once they were glued.  Score the strip at 1" on both ends, this will become your purse handle.  (You can see I used my Scor-Buddy to score this strip of paper.  It is a really handy size!)

Adhere the purse flap to the side walls by gluing the back side with a strong adhesive, either hot glue or an adhesive like Beacons 3-in-1. Then you can adhere the handle to the center of the purse flap.  


Attach a velcro dot to the inside front of the purse flap and the outside of the purse's front sidewall.


I used Spellbinders Doily Motifs dies to create the purse latch, adding some Bitty Blossoms and Foliage dies for embellishments.
 

Because the purse is round, if you don't attach something under the purse to stabilize it, it will not stay up straight.  In this pic, I show you what I came up with.  
Simply, score a piece of 1 1/2" x 6" paper three times at the 1 1/2", 3", and 4 1/2" mark.  Fold then adhere to the bottom of the purse. 


Well, thanks so much for stopping by!  I hope this has inspired you to give it a try!  These make great teacher, hostess or whomever gifts!

Janice 


Wednesday, July 17, 2013

May Arts and Scor-Pal with Steph Ackerman

Hey everyone.  Today the  designers for Scor-Pal  and May Arts are coming together in a blog hop.

Check out what everyone has been creating with their Scor-Pals and some beautiful ribbons from May Arts.

My project is a Friendship Box


Cut blue cardstock into a 9” square.
Score at 3” and 6”.
Rotate cardstock 90 degrees and score at 3” and 6”.
Turn cardstock so that the points are at the 6” spot and score from the point to the first score line.
Repeat for each corner.
Fold on score lines, folding the corners inward.


Using a floral rollagraph wheel, roll over white cardstock with Pinkolicious Ink.


Cut floral cardstock into 5 squares – each 2 7/8” x 2 7/8”.
Ink edges with Pinkolicious Ink and adhere 4 of them to the outside base within the scored lines.


Using a wordy rollagraph wheel and Squash Ink, roll across white cardstock.


Cut cardstock into a 9” square.
Score at 3” and 6”.
Rotate cardstock 90 degrees and score at 3” and 6”.
Cut out the 4 corners, creating a "T" shape.
Cut the corner pieces on a diagonal and trim to fit the corners of the base.
Ink edges with Squash Ink and adhere with the words showing.

Using the white side of this piece, ink the edges with Squash Ink.
Trim to fit.
Add Scor-Tape to the center panel and adhere, leaving the other flaps free.


Stamp 6 assorted sentiments on white cardstock with Very Berry Ink and emboss with Clear Embossing Powder.  
Cut, ink edges and mount 5 sentiments on blue cardstock.
Add 4 sentiments to the interior white flaps.
Stamp flourish on the center flap with Squash Ink and emboss with Clear Embossing Powder.
Die cut a sentiment into a circle and add to the center with foam adhesives.


To create the box top:

Cut blue cardstock 5 1/8" x 5 1/8” and score 1” around this piece.


Adhere the remaining floral panel to the center.
Cut along score line to the next scored line on each side. 
Add Scor-Tape to the smaller flaps and fold in to create the box top.


Add Scor-Tape around the edge of the box top.
Add Eyelet Trim  lace around the edge.
Clip at the corners so the ribbon lays flat.


Add Scor-Tape to the pink ribbon.


Place pink ribbon on top of the lace ribbon, pulling off the Scor-Tape in sections as you work.


Adhere the final sentiment to the box top.
Stamp a butterfly with Very Berry Ink and emboss with Clear Embossing Powder.
Add dots of color to the butterfly with Smooch Ink.
Adhere to the top with foam adhesives for dimension.


Add pearls around the box to finish.


Here is today's blog order. Don't forget to leave a comment on everyone's blog.


Charlene Driggs
Lori Williams
Christina Colon
Steph Ackerman - HERE
Deedee Catron
Toni Storie
Emily Lanham
Tyra Smith
Erin Thiem
Virginia Niebel
Gini Williams Cagle


Supplies:
Scoring tool:  Scor-Pal
Adhesive:  Scor-Tape
Ribbon:  May Arts
Ink, Smooch, Rollagraph, Embossing Powder:  Clearsnap
Cardstock:  Bazzill
Stamps:  The Stamps of Life, Hero Arts
Dies: Sizzix
Pearls: Hero Arts

Monday, July 15, 2013

May Arts and Scor-pal with Katie Tate

It's my turn today for the cross promotion on the Scor-Pal blog between Scor-Pal and May Arts.
For my projects I decided to make a Paris themed purse designed to hold notecards.


Project Recipe:
Tools - Scor-Pal, and Scor-Mat Adhesive - Scor-Tape and Hot Glue
Stamps - Moulin Rouge Tilda
Medium - Copic Markers
Paper - Countryside Villa by The Paper Studio
Border Punch - Martha Stewart
Die Cuts - Oval and Beaded Oval by Spellbinders
Accents - The Paper Studio
Hinge - Making Memories
Fabric Brad - The Paper Studio
Ribbons/Trim - Eyelet Trim, Black and White Chevron Wired all May Arts


Here you can see the items used in this project.


The base of the purse is made from black card stock measuring 12" by 6" scored at 4" and 8" along the 12" side.


For the pockets inside you start with a piece of card stock 10" by 4"
On the 10" side score at 1", 2", 8" and 9"
On the 4" side score at 1" and 2"
Burnish all folds


Decorate the front as wished.
Trim the corner flaps as in the photo and add Scor-Tape as in the photo to create the pocket.


Decorate the inside panels of the purse before adding the pockets that will hold the cards


Punched both sides of 12" by 1 3/4" strips of cardstock to create the handles.
Use Scor-Tape to attach to the inside panels of the purse.


Decorate the handle and purse edge as you desire.


Here you can see the double pockets inside the purse.


This flower was created from a 12" length of eyelet trim that was gathered along the edge with a simple running stitch and then the ends stitched together once gathered.
It was topped with a fabric brad


The completed purse.
A metal hinge was used as the fastener on the top. The hinge was attached with brads on one side and a magnet attached to the front inside top so that the hinge would attach and hold the purse closed.

The following are just close ups of the decoration.