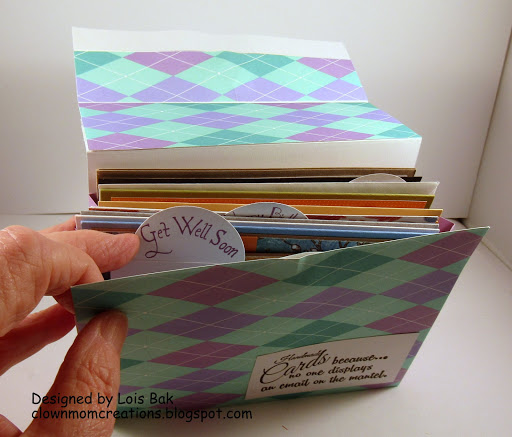
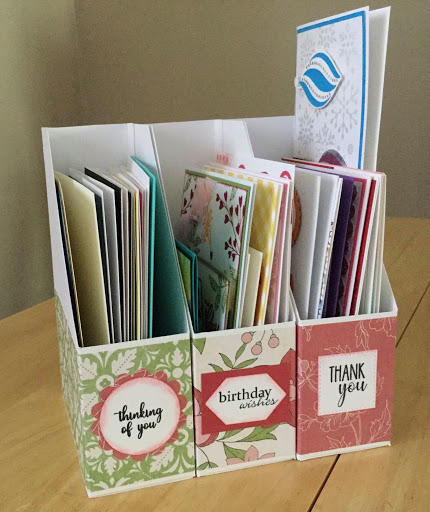
This project was inspired by a project on the Scor-Pal Pinterest board by Gini Cagle. It's a cute box that opens up to reveal 3 trays.
This box was my inspiration:
To make this box, you will need:
One 6" x 9" piece of cardstock (I used Accent Opaque Digital Cover Smooth 120 lb. White cardstock)
One 6" x 11" piece of cardstock (I used White, as above)
Three 4 5/8" squares of cardstock for the trays (I used White, as above)
You can then cover and decorate your box as you like. These are the pieces you need to make one like mine:
Five 3" squares of cardstock (I used Green Bazzill Basics Paper cardstock)
Six 3/4" x 3" pieces of cardstock for the edges of the trays (I used Green cardstock, as above)
Three 2 7/8" squares of complementary coloured cardstock (I used some pale yellow cardstock)
Three 2 3/4" squares of patterned paper (I used Crate Paper Oh Darling paper)
Embellishments for the three decorated sides (I used the dragonfly from the Gina K. Designs Follow Your Dreams stamp set by Theresa Momber; Spellbinders Nestibilities Big Scalloped Ovals Small die and Spectrum Noir alcohol markers MG3, BT5, AG2, IG5)
There is a great tutorial by Heather on Splitcoaststampers with a video (actually 4 videos!). I'll describe it here, but if anything is unclear, check out her step by step instructions.
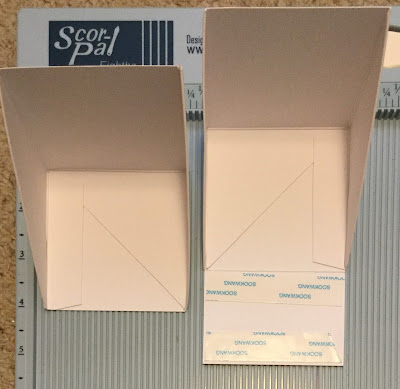
Start with the piece of 6" x 9" cardstock and score at 3" and 6" on the long side, and 3" on the short side. Referring to the picture below, score on the diagonals in the two top edge squares. Score again 1" away from the diagonal score lines and trim the corners off. Cut up from the bottom on the bottom left square, and cut along the diagonal in the bottom middle square. Finally, create the tab in the bottom right square. It is 3/4" wide. Crease all score lines and set aside.
Next, take the 6" x 11" piece. Score at 3", 6" and 9" along the long side and at 3" on the short side. Score along the diagonals of the top edge squares like before, trimming off 1" past the diagonals. Cut up from the bottom of the 6" score line, trim off the diagonal to the left of the cut you just made, and create the 3/4" tab on the bottom left square. The flap on the bottom right will be used to attach the two sides of the box together. Crease all score lines.
- Remove the backing and fold the flaps in to adhere the tape. Add Scor-Tape to the bottom of the triangular flaps and the 3/4" tabs.
Remove the backing paper and attach the triangular flap to the bottom square to create the first corner. Then attach the tab to create the second corner. This is one half of the box. Repeat with the other piece.
Attach the two sides together, placing the flap on the back of the other half.

Score at 7/8" on each side of the three 4 5/8" squares. These will be the three trays. Cut from the bottom of the score lines on one side up to the perpendicular score line. Repeat on the opposite side. Trim the corners slightly to give a better fit when you fold it into the tray.
Add Scor-Tape to the corner flaps and adhere to the inside. Repeat for all three trays.
Attach the 3/4" x 3" strips of cardstock along two sides of each of the trays. Trim slightly, if necessary.
Attach a tray at the top and bottom of the left side of the box. On the right side of the box, on the inside, make a mark at 1 7/8" from the top, along the side and back. Attach the third tray with the bottom of the tray along the mark you made. I held it in place to make sure it would fit before I attached it with the Scor-Tape!
Tape your five 3" squares of cardstock to all the sides except the bottom. Add your three 2 7/8" squares to the top and to the right and left sides of where the box opens. Add your patterned paper on top and embellish as desired.


