Tuesday, October 22, 2013

Scor-Pal and Graphic 45 Week with Steph Ackerman

For your entry today I need you to comment and also to follow our Pinterest board if you don't already!
You can find all the wonderful Scor-Pal projects at Pinterest


Good morning everyone, Steph  here today.  This week Scor-pal  and Graphic 45 are working together to create some wonderful projects for you.

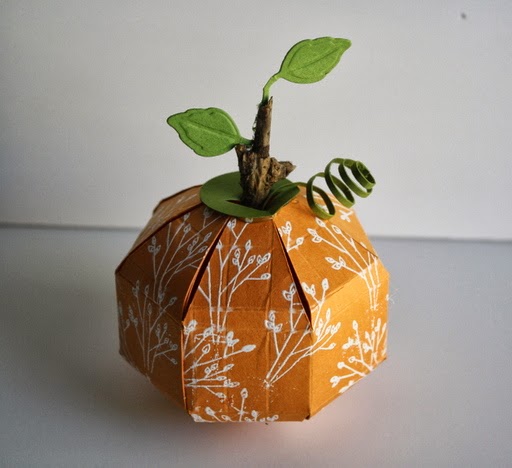
I received the awesome Graphic 45 Secret Garden Collection and knew I wanted to create a box.  This paper collection is gorgeous with it's assorted colors and designs and I knew it would be perfect for the mini box I had in mind.  Then I also created some mini cards to fit inside
.


To create the box:
Using Spellbinders Grand Calibre Label Dies, die cut two pieces of green cardstock.
Cut 2 strips of green cardstock 3" x 12".


Adhere the 2 strips together to create one continuous strip and then cut it down to 17 1/2".
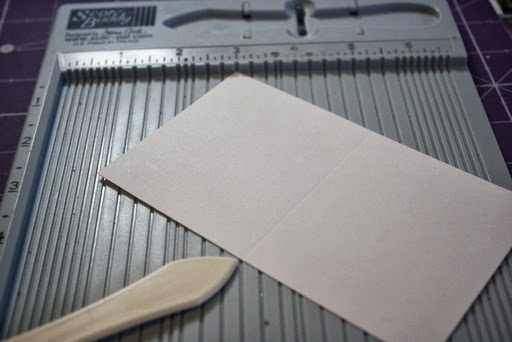
Score horizontally as follows:
1/2", 4 3/4", 9".
Rotate the strip and score at 4 1/4".


Rotate the strip vertically and score  at 1/4", turning the strip to finish scoring.
Add Scor-tape to the length of the strip.
Snip through the tape to the vertically scored lines (these will create the shape of the box).
Adhere the ends together to create the box sides.
Center over one of the die cut labels and adhere to create the box.


For the exterior:
Cut pink cardstock 2 1/2" x 4".
Cut pink pattern paper 2 3/8 x 3 3/4".
Cut brown cardstock 2" x 3 1/2".
Cut blue pattern paper 1 3/4" x 3 1/4".
Ink all edges with Clearsnap's Chox Ink in Sparrow before assembling.


To create the "hinge", cut green cardstock 3" x 3" and score in half. 
Add Scor-tape to one half and adhere inside the box.
Add Scor tape to the top half.


Center the second green die cut on top of the "hinge" and adhere.
Using several different sized dies, cut white cardstock and pattern paper to finish the box top, inside and out.


Adhere a Graphic 45 keyhole to the center of the front using ScraPerfect's The Best Glue Ever.
Add Want2Scrap bling around the key hole letting it flow around the sides.


Finish off the inside -
Cut pink cardstock 2 1/2" x 4".
Cut pink pattern paper 2 3/8 x 3 3/4".
Cut white cardstock 4" x 4" for the bottom.
Ink all edges with Clearsnap's Chox Ink in Sparrow before assembling.


Now let's create some cards to go inside the box.


Use left over scraps to create assorted cards.
Cut cardstock 8" x 4" and score at 4" to create 4" x 4" cards.
Add strips of cardstock across the center of each.
Cut apart elements of the pattern paper and ink edges with Clearsnap's Chox Ink in Sparrow.
Stamp assorted sentiments on each using ColorBox Wicked Black Archival Dye Ink.
Adhere to card fronts.


The cards are a perfect fit.  


Wouldn't this make a great birthday gift set or perhaps a Mother's Day gift set?

Thanks for stopping by today.

Steph


Monday, October 21, 2013

Scor-Pal and Graphic 45 Week with Abby Henderson

Here we are with the second projects of our very special week of projects you featuring the fabulous Scor-Pal products and the gorgeous papers of Graphic 45!

We will have projects here and over at the Graphic 45 blog


We have 2 Scor-Buddies up for prizes and there are giveaways at the Graphic 45 blog too. There are plenty of ways to win, each day will be a little different but will involve a little commenting from you, our wonderful viewers.
For Abby's post I'd like you to make a comment about your favorite part of the project.

Hi Friends! This is Abby with ScrappinAbby.  For this project, I had the pleasure of working with the amazing papers from Graphic 45.  Using the gorgeous French Country collection and my Scor-pal, I made a French Country Port Wine Gift Bag.
To create the gift bag, I took a 12x12 piece of paper from the French Country collection and placed it on my Scor-pal and made score marks at  2 1/2", 5 1/2", 8" and 11"
 Next I rotated the paper and made another score mark at 1 1/2". You can adjust the height of your gift bag depending on how tall your beverage bottle is that you are using. 
 I then folded along all of my score lines and made the cuts that you'll see in the photo below
 I used Scor-tape on the edges and flaps that will create the gift bag. I do want to note that I inked all of my edges and placed my embellishments on the gift bag before I assembled it. I find doing this makes adding the final touches easier to do.
Once I assembled the gift bag, I took a 1/2" of paper to create the handle. Before covering it with some modge podge, I used a slightly smaller width strip of paper to add accent to the handle. The reason I used the modge podge was to give the strip of paper some added durability since it would be carrying the gift bag with a bottle of wine in it.  Next I added some fussy cut images from the French Country collections, a mix of flowers and some crinkle ribbon. 
I wrapped some jute around the top of the bottle and used one of the G45 Metal Tags. Here you can easily write the name of the receipient or you could use a label.
I added more modge podge to the label I fussy cut from the collection and tucked some flowers and crinkle ribbon around it. I thought this would be a fun way to dress up the gift bag.  In the next few photos you can see how I applied some Crackle Accents to the fussy cut roosters to create an aged looked and to add decor to the sides. This way if it's displayed on a kitchen counter it looks complete on all sides. 
I really love how this wine gift bag turned out and using the gorgeous papers from G45 and the Scor-pal products really made this project look elegant. This is such a quick and easy project to create and you can adjust the height and width to accommodate whatever type of beverage you are giving.  Thanks for stopping by the Scor-pal blog and for checking out another ScrappinAbby project. I hope I was able to show you a creative way to use the amazing Scor-pal and G45 products.  Happy Crafting!!  

Drop back tomorrow for more projects and more ways to win!

Katie

Scor-Pal and Graphic 45 Week with Virginia Nebel

Today marks the start of a very special week of projects you featuring the fabulous Scor-Pal products and the gorgeous papers of Graphic 45!

We will have projects here and over at the Graphic 45 blog


We have 2 Scor-Buddies up for prizes and there are giveaways at the Graphic 45 blog too. There are plenty of ways to win, each day will be a little different but will involve a little commenting from you, our wonderful viewers.

Today I'd like to you leave some love here for our designer Virginia Nebel and make sure you are a follower on our blog to be eligible to go into the drawer.

Graphic 45's Bird Song collection is made up of beautiful Asian inspired motifs.  I created a 12 x 12 page by layering a few patterns and fussy cutting out some tags and lanterns.  I used the Scor-pal tool to create the half rosette by scoring a 10 x 1.5 inch strip in .025 inch intervals.

This layout celebrates a very special memory when we were in China and my daughter was  presented with a gift from China's Cultural Affairs Minister.  A booklet of finely silk stitched Asian symbols of the Chinese Zodiac.


Supplies: Graphic 45 Bird Song collection, Scor-pal tool, American Crafts cardstock.


Remember to leave a comment and be sure to pop back later for another project and another chance to win (1 entry per comment (max 1 per post)

Katie

Tuesday, October 8, 2013

A Fall Inspired Project from GDT Janice

Hi, everyone! Here in Texas, cooler weather is finally hitting us and it has inspired me to update the traditional paper pumpkin. :) 

 Here is what I came up with:
Isn't is cute?  ;)  I love the idea of making a few of these in different colors and sizes and displaying either as a center piece or through the house for some fall decor.  :)

The How-to
I started out with a 4 1/4" by 11" piece of orange card stock that I heat embossed a pattern onto (Gina K Designs stamp set, Whimsical Autumn).

First, using your Scor-Pal, score along every 1/2" mark along the length of the card stock.

Then, turn it width-wise and score at these marks: 1/2", 1 1/4", 1 1/2", 2 3/4", 3", and 3 3/4".

On the surface of your Scor-Mat, cut off triangular sections from both ends of your scored card stock using a craft knife and ruler as shown below.  Start at first corner and cut diagonally stopping at third scored line down (the line scored at 1 1/2").  From there, position your ruler and cut to the top of the next 1/2" line continuing that cutting pattern all the way across.

Do the same technique to both the top and bottom of the scored card stock.

Turn the piece over and using a bent tool, press and create a rounded shape on each section of the piece by pressing firmly over a foam pad in vertical stokes.

Turn the piece vertically and create a round shape using the same technique as above.

Place stripes of Scor-Tape on the inside edge of each section.

Take the paper backing off and gently adhere the flaps together as show below.

Cut a 1" circle and glue to cuter opening. This will be the bottom of your pumpkin.

Cut a 1" circle and using a craft knife and your Scor-Pal mat, cut some cross-hairs about 3/4" long. This will be adhered to the top of the pumpkin and allow for a stem to fit inside.

Adhere the green circle to the top of the pumpkin using hot glue.  For my pumpkin, I added a branch from my back yard to be the stem, hot glued a couple of Spellbinder's Foliage leaves, and added a fun curly vine for extra flair.

I hope you've enjoyed this little tutorial!  Comment below with pics or links of your cute paper pumpkin decor--I'd love to see what you come up with!

Have a wonderful day!
Janice :)

Janice :)

Saturday, October 5, 2013

World Card Making Day 2013 with Scor-Pal!

Happy Saturday Scor-Pal friends and a very Happy World Card Making Day!
It is the 8th year that this day has been celebrated and hopefully you will have time to do a little creating today!
If you didn't already know one of the best tools for card makers is the Scor-Buddy the "baby brother" of the original Scor-Pal and a real must have for any card maker.
Today we have a few cards to share with you from our wonderful Scor-Pal team that hopefully with encourage you to make time for creating today!

Click on the names to see what wonderful things our team has for you today.

Stephanie
Abby
Lisa
Katie

Please go and see them and leave them a little love and then get out your Scor-Buddy or Scor-Pal
If you get something made then we'd love to see it, leave a link in the comments on this post and we'll drop by to leave you some love too!

Katie

Tuesday, September 24, 2013

Keep Calm with Guest Designer Janice

Hi, everyone!  Janice here with a fun "on trend" card to show you.  :)  Bright neon colors mixed with the still very popular chevron stripe, makes for one super fun card! 

Isn't that fun? :)

To make the chevron strip that I placed on my card, I used the Scor-Buddy to score a 1" x 5 1/2" piece of cardstock. 

 I went ahead and used a larger piece of cardstock to make it a bit easier to score but I only used the first 1" of the paper.  I scored at the 1/2" mark vertically at each 1/2" mark horizontally as shown in the pic below.

 I forgot to take a pic of how I drew the lines to create the chevron pattern (sorry!) but it was quite simple!  Take a ruler and draw a line from one corner of the squares created then up the other side to the corner of the square right next to it.  Do that for each set of side by side squares as shown in the picture above.  After I drew the pattern I colored it in and cut the excess cardstock off! Easy peasy!  ;) 


Next, I cut a 3 1/4" x 5 1/2" piece of white card stock and lightly scored it down the center at 2 3/4".
 

I then lined up the end of my lightly scored center line and one of the opposite corners of the piece and scored it.
 

Next, I scored at 1/2" intervals on both sides of the initial diagonal line as shown below.


Next, I turned the piece to the other corner and scored in the same way to that side.


The next step was to adhere my chevron strip and put my card together!


You can use this technique of making a scored grid to make bigger, wider chevron stripes for any project!  :)

My card uses a Hero Arts stamp for the greeting. I couldn't find the name of the set but on the package it says: Hero Arts CL650.


Thanks so much for stopping by!
Janice :)


Janice :)

Tuesday, September 17, 2013

Winners from the Authentique week!

I am so happy to announce that two lucky viewers who left comments on both our blog and the Authentique blog will be receiving A Scor-Buddy!!!

Our lucky winners are Aunt Dee and Mary Louh!!
If you would email me at katetate@tx.rr.com I can get your prizes on their way to you!
Thanks so much to all the people that commented last week, I saw lots of new faces and I hope you will stick around to see all the wonderful things we have in store for you here at Scor-Pal.

Katie