Hi friends! Here at Scor-pal we are having a week full of Bunches of Beautiful Boxes and I am really excited to share my Ladies Diary Vintage Hat Box & Tags with all of you. I love all things vintage so this was the perfect box for me to create for this project.
Products used:
G45 Ladies Diary & Little Darlings
Vintage lace & trims
Corrugated Card Stock
~Please see my BLOG for additional supplies used~
Now this may look like a complicated project but I promise you it's pretty easy. I spent more time decorating and embellishing the box than I did to construct it.
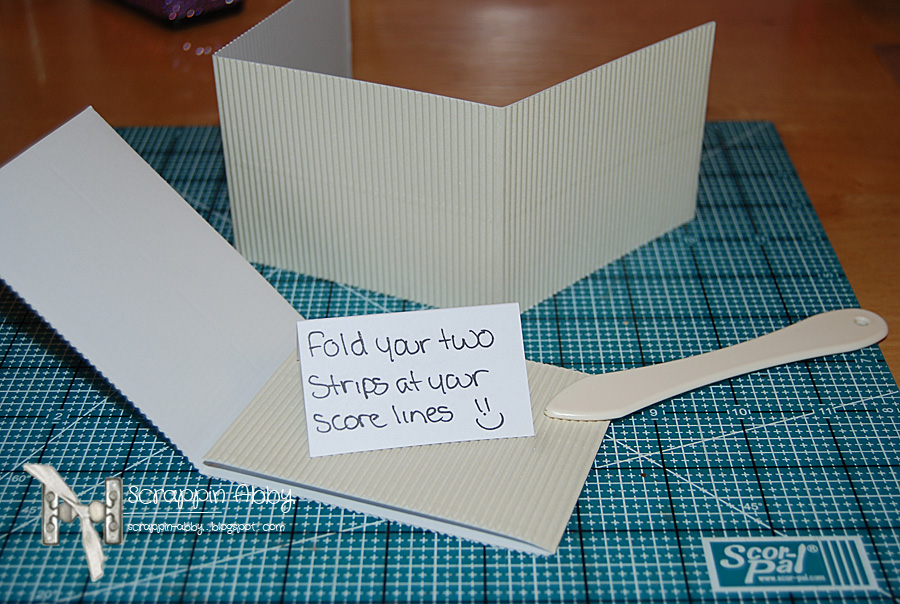
To begin with I scored the 12x12 corrugated card stock at 4" & 8"
Next I placed my card stock with the score lines in the horizontal position on my trimmer and cut two 2" strips
Next I folded along my score lines on both strips of card stock
I used some Scor-tape to attach the two strips together
Next I cut two strips of white card stock into 1" strips. I used these to cover the joined edges on the inside of box.
Now that the body of the box is completed...it's time to work on the base and lid. I created the base & the lid using the same method, the only difference is the edge measurement for the lid which I'll get to in just a moment.
For the base, I placed my box on a piece of 12x12 card stock and made a light pencil mark at the point of each corner.
Next I pretty much connected the dots and made the basic shape of the box. To ensure I had enough card stock to fold up onto the bottom of the box, I measured out 1/2" from the outside measurement of the box base. For the lid I measured at 1" as I wanted more of a lip for this part.
I cut the shape from the card stock then placed it on my Scor-pal and made a score mark on the inside lines.
I made a small slit at each corner and then used more Scor-tape
I didn't take any photos of putting this together but all I did was place the box body onto the top of the base I made, peeled off the Scor-tape one strip at a time and adhered it to the box. I did the same process for the lid except for the Scor-tape since you want the lid to come off.
Please note that I did the next step before I adhered the base. I chose to paint the inside of my box since it was just white and then I attached a piece of coordinating patterened paper on the inside. I think doing this gives the box a finished & polished look.
Once you finish making your lid, your box is complete and the fun part begins...decorating & embellishing...my favorite part!!
I added this amazing metal gold trim along the base of the box and added some true vintage lace to the lid.
The rest of the photos show you the box all completed along with the tags I made for the inside.
I am really pleased with how well this box turned out. It's my first time making a six-sided box and I love it!! This looks so beautiful displayed in my house and I can't wait to make more for future gifts.
Thanks for stopping by the Scor-pal blog. You are in for a real treat this week with the other amazing Bunches of Beautiful Boxes by my fellow DT Sisters : )
Happy Crafting!!


5 comments:
What a lovely project! It does look easier when you break down all the steps!
This is simply beyond gorgeous!!!! I can hardly find the words to say how much I love it!!!
Teri
Wow! That is one fantastic box! tfs
Wow! BEautiful and thanks for all the instructions! TFS
Beautiful vintage style!
http://lusillasworld.blogspot.com/
Post a Comment