Hello again everyone,
It's
Joann here again and I am delighted to show you another fun little box to make. I got the idea from a candy box that I was given that had sides that opened up so you could almost fold the box flat. Well, I got out my trusty little craft knife and took it apart to see how it was put together : )
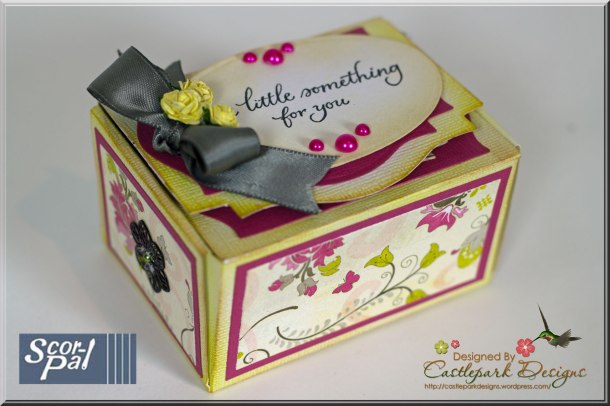
and here it is open
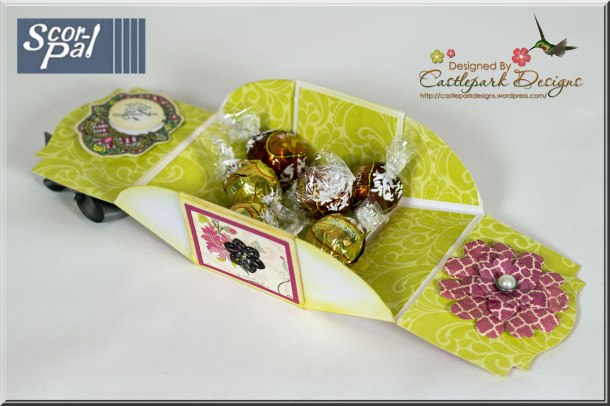
To make this fun little box follow these simple steps:
Step 1
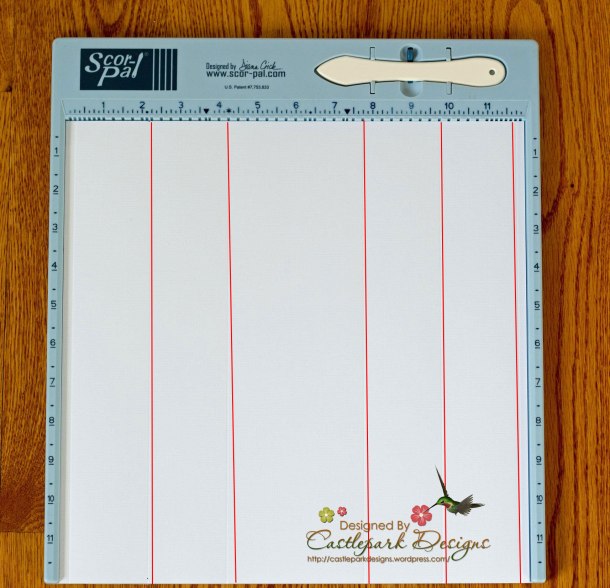
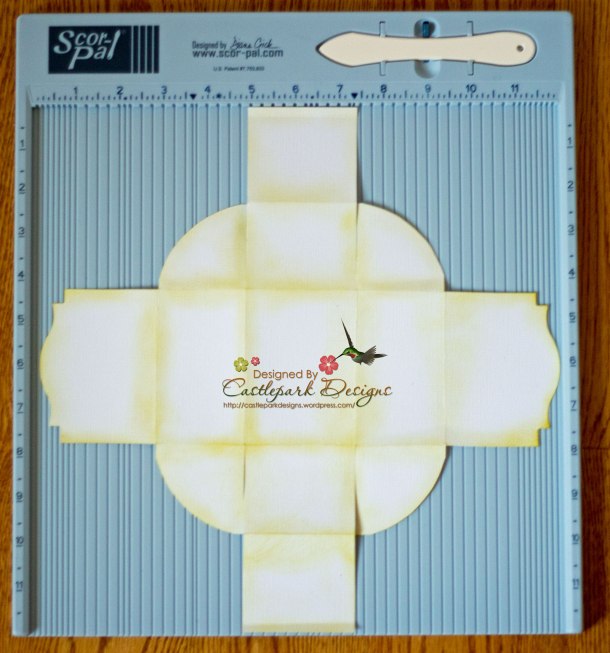
Score at 2 ¼, 4 ¼, 7 ¾, 9 ¾ , and 11 ¾
Step 2
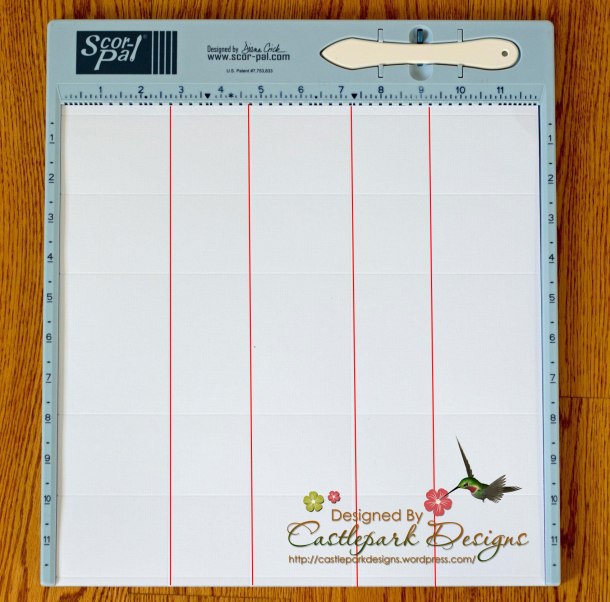
Flip to the other edge and score at 2 ¾, 4 ¾, 7 ¼, and 9 ¼
Step 3
Trim off the extra pieces to leave the final shape as shown
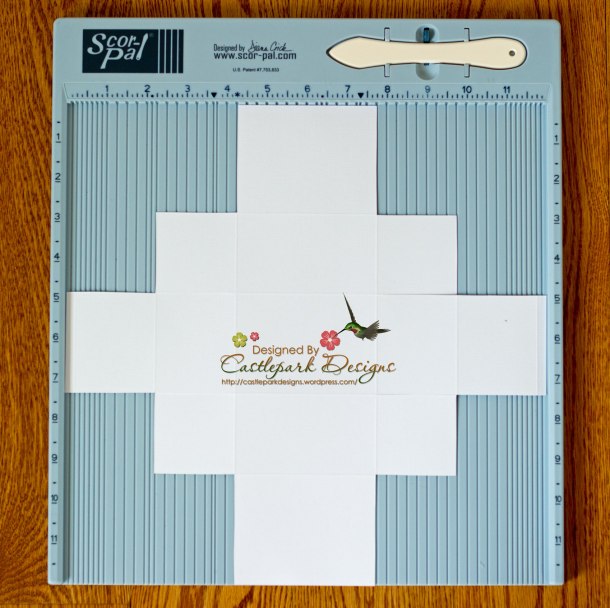
Step 4
To round the flaps so the box will open and close I simply took an oval die and traced the shape and fussy cut the flap.
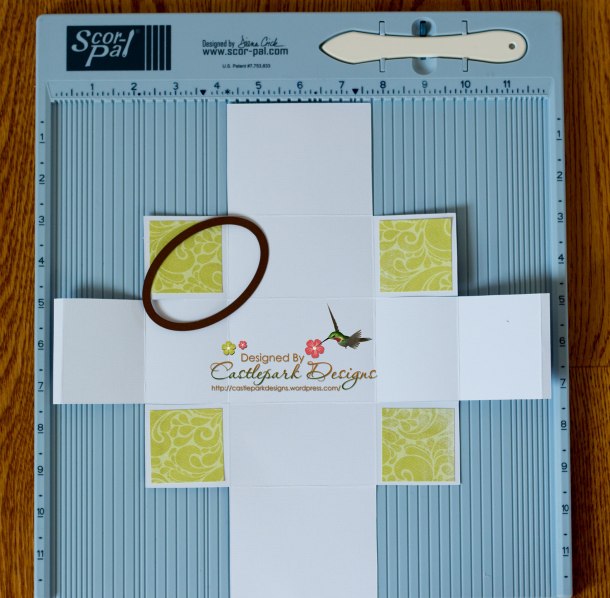
Step 5
To make the flaps on the top of the box a little nicer I took my Spellbinders die and placed the flap through as shown and then run this part through your machine far enough to cut the die.
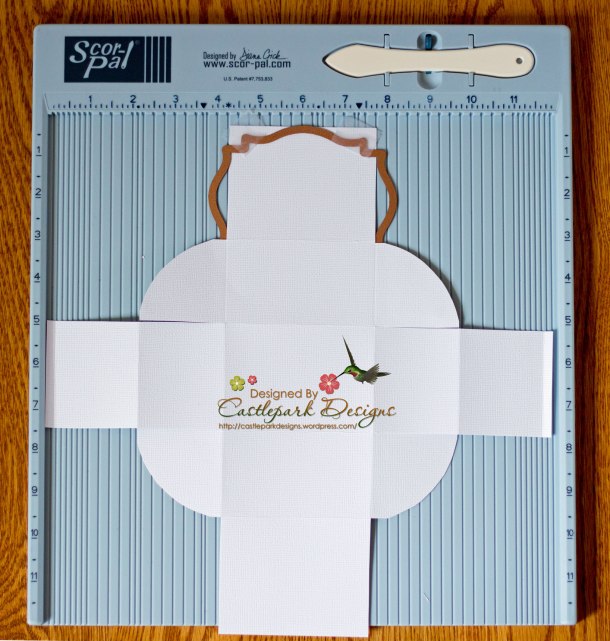
Step 6
Finish the inside by adding DP before you assemble the box
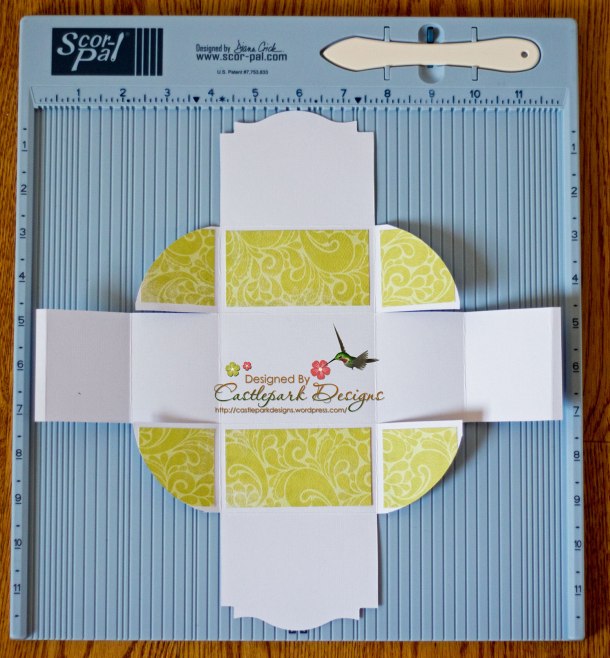
Step 7
I distressed the edges of the outside of the box before decorating with more pretty DP
Here's a list of the products I used for this project:
Cheery Lynn Designs XM-7 - Oval Classic
Spellbinders - Labels Eighteen
Spellbinders - Decorative Labels Twenty-Seven
Spellbinders - Petite Ovales Large
JustRite - Spring Rose Medallions
JustRtie JB-10025 - Nested Oval Medallion Labels
Stampabilities - CR1069
My Mind's Eye Collectable Paper
AC Cardstock
Thanks so much for visiting my blog and I hope you can come back and visit again soon!

 and here it is open
 To make this fun little box follow these simple steps:
Step 1
Score at 2 ¼, 4 ¼, 7 ¾, 9 ¾ , and 11 ¾
 Step 2
Flip to the other edge and score at 2 ¾, 4 ¾, 7 ¼, and 9 ¼
 Step 3
Trim off the extra pieces to leave the final shape as shown
 Step 4
To round the flaps so the box will open and close I simply took an oval die and traced the shape and fussy cut the flap.
 Step 5
To make the flaps on the top of the box a little nicer I took my Spellbinders die and placed the flap through as shown and then run this part through your machine far enough to cut the die.
 Step 6
Finish the inside by adding DP before you assemble the box
 Step 7
I distressed the edges of the outside of the box before decorating with more pretty DP
 Here's a list of the products I used for this project:
Cheery Lynn Designs XM-7 - Oval Classic
Spellbinders - Labels Eighteen
Spellbinders - Decorative Labels Twenty-Seven
Spellbinders - Petite Ovales Large
JustRite - Spring Rose Medallions
JustRtie JB-10025 - Nested Oval Medallion Labels
Stampabilities - CR1069
My Mind's Eye Collectable Paper
AC Cardstock
Thanks so much for visiting my blog and I hope you can come back and visit again soon!

Love this box.
ReplyDeleteI really like this box, I will be trying this one,
ReplyDeleteAwesome design! Looks like fun.
ReplyDeleteThis looks marvelous! Love the rounded and die cut flaps!
ReplyDeleteFantastic expanding box! tfs
ReplyDeleteI love this! You always do a great job. So glad to have you guest designing for us!
ReplyDeleteGini
Love this. Thanks for the tutorial!
ReplyDeleteWhat a great box! Thank you for sharing the instructions!
ReplyDelete