Hey everyone..I am really excited to share my Winter Wishes Tealight tutorial with all of you. Before you know it the holiday season will be here and I wanted to make something that I could use to decorate my home this winter.
Supplies used:
Pink Paislee Firecracker CS (even though it's 4th of July paper, I liked the color)
Stampendous Frontage Shabby White emboss enamel
Perfect Medium
Tim Holtz Adirondack Alcohol Ink-Stream (used on the clear bling pieces)
Want 2 Scrap Bling
Tim Holtz Distress Ink-Iced Spruce
Craft Smart-White Ink
Luminarte Pearl Gold Shimmer Mist
Martha Stewart Snowflake border & punch all over the page punches
Really Reasonable Ribbon-Silver ribbon-on inside edge of tealights
Vellum
Tealights
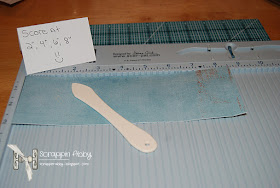
I cut 3 pieces of card stock 3" x 8 1/2" and scored each piece every two inches
I knew I wanted a punch border and a decorative punched center for the tea lights so I did this step before assembling the boxes.
I then used this amazing shabby chunky embossing enamel to make the snowflakes pop from the boxes.
Next I used a combination of Iced Spruce and white inks.
Even though I wasn't ready to assemble the boxes at this point. I folded them on the score lines so I could easily ink the edges.
I added some shimmer spray to give them that wintery sparkle...almost like frost.
While the shimmer mist was drying I cut my vellum pieces for the openings on the boxes.
I then attached the vellum pieces using the ever amazing Scor-Tape. Side note..I've purchased "vellum tape" before and it always shows through unlike the Scor-Tape which is amazing for vellum projects!
Once I was ready to assemble the boxes, I put a strip of Scor-Tape on the inside flap.
I added some silver ribbon on the inside edge to complete the look and to hide the pattern on the other side of the paper. I will admit that I forgot to do this step before I assembled them. You can do it the way I am showing you in the photo below but it's much easier to do when the box is still flat.
After they were assembled I felt like something was missing so I used some alcohol ink on some clear pieces of bling. This is a great way to customize & make your own bling pieces to match your project.
Here they are all lit up with the tea lights inside....
The only tealights I could find in my local stores were yellow but you get the idea of how cool they look with the tealights inside.
I can't wait to use these this holiday season as part of my home decor. This is a super easy and fun project to make and the different themes and possibilities are just endless.


Beautiful, Abby! I would like to order 8 of them!
ReplyDeleteoh these look fabulous! thanks for the tutorial :)
ReplyDeleteThese look gorgeous
ReplyDeleteOh so pretty!
ReplyDeletelove love those tea light bags
ReplyDeleteava g
Beautiful idea!
ReplyDeleteThese are gorgeous Abby!
ReplyDeleteWow wonderful project, so imaginative. They look spectacular!! Great tutorial, easy to follow, well written. Thanks!
ReplyDeleteDiana
Thanks for sharing this awesome project! I love it, I'll give it a try even though i don't have all the tools.
ReplyDelete